How to Use Jupyter Notebook for Data Science?

Definition and Overview of Jupyter Notebook
Jupyter Notebook is an open-source web application that allows you to create and share documents that contain live code, equations, visualizations, and narrative text. It is widely used for data science, machine learning, and scientific computing. Jupyter Notebooks are also used for teaching and education, as they provide an interactive and engaging way to learn about programming and data analysis.
Key Features of Jupyter Notebook:
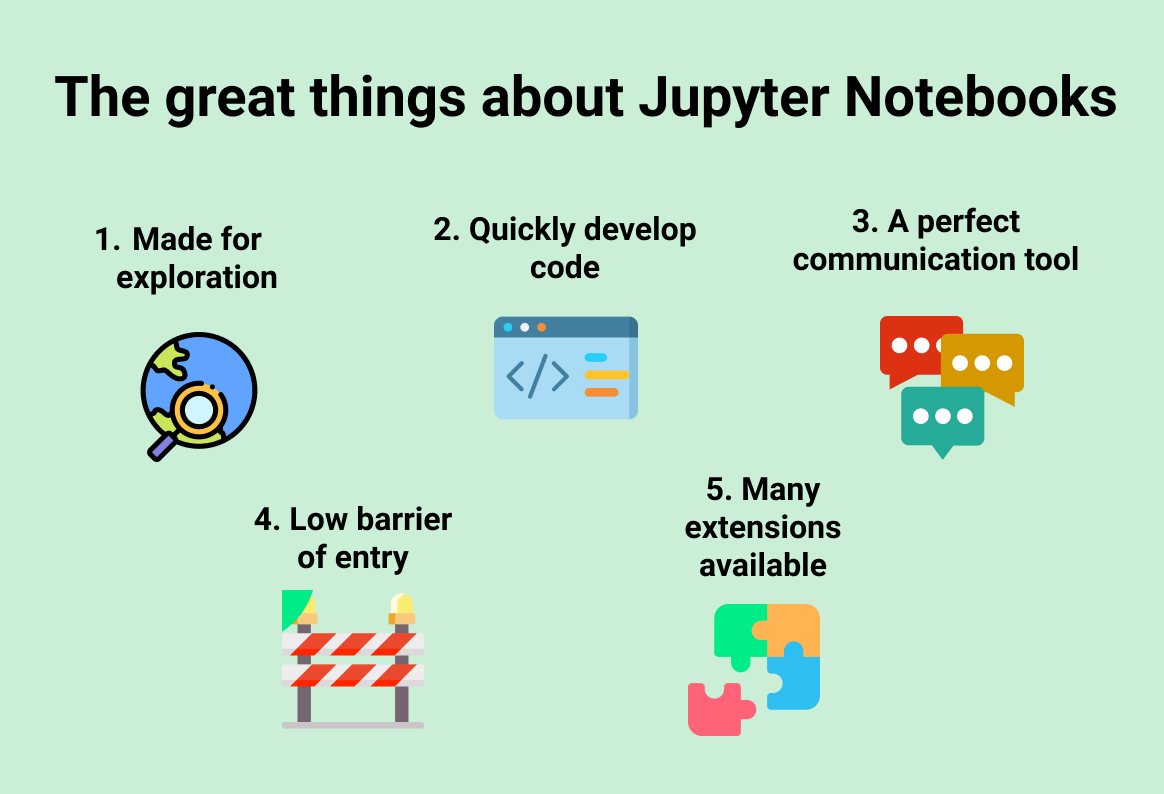
Image Source:Medium
- Interactive code execution: Jupyter Notebooks allow you to execute code line by line or in blocks, and see the results immediately. This makes it easy to experiment with code and to debug problems.
- Rich text and code formatting: Jupyter Notebooks support Markdown for formatting text, as well as LaTeX for displaying mathematical equations. This makes it easy to create professional-looking documents that combine code, text, and equations.
- Embedding visualizations: Jupyter Notebooks can embed visualizations from a variety of libraries, such as Matplotlib, Seaborn, and Bokeh. This makes it easy to visualize data and to understand the results of your analyses.
- Sharing and collaboration: Jupyter Notebooks can be easily shared with others, either directly or through cloud-based platforms. This makes it easy to collaborate on projects with others and to share your work with the world.
Benefits of Using Jupyter Notebook for Data Science
Jupyter Notebook is a powerful tool for data science because it provides a number of benefits, including:
- Ease of use: Jupyter Notebook is easy to learn and use, even for those with no prior programming experience.
- Interactivity: Jupyter Notebook allows you to interact with your data and code in real time, making it easy to explore and understand your data.
- Reproducibility: Jupyter Notebooks are self-contained documents that capture your code, data, and results. This makes it easy to reproduce your analyses and to share your work with others.
- Community: Jupyter Notebook has a large and active community of users who are always willing to help. This makes it easy to find answers to your questions and to learn new things.
Installing and Setting Up Jupyter Notebook
Jupyter Notebook is easy to install and set up on a variety of platforms, including Windows, macOS, and Linux. There are a number of different ways to install Jupyter Notebook, but the most common method is to use the pip package installer.
Installing Jupyter Notebook with pip:
- Open a terminal window.
- Type the following command and press Enter:
This will install Jupyter Notebook and all of its dependencies.
Launching Jupyter Notebook:
- Open a terminal window.
- Type the following command and press Enter:
This will launch the Jupyter Notebook web application in your default web browser.
Once you have installed and launched Jupyter Notebook, you are ready to start creating and sharing your data science work.
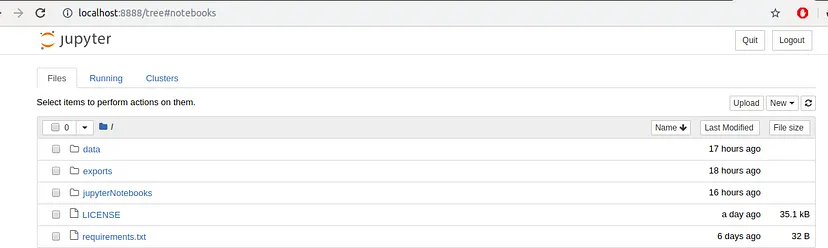
Image Source:Medium
A browser window should immediately pop up with the Jupyter Notebook interface. As you might have already noticed Jupyter’s Notebooks and dashboard are web apps, and Jupyter starts up a local Python server to serve these apps to your web browser. It makes Jupyter Notebooks platform independent and thus making it easier to share with others.
The Files tab is where all your files are kept, the Running tab keeps track of all your processes and the third tab, Clusters, is provided by IPython parallel, IPython’s parallel computing framework. It allows you to control many individual engines, which are an extended version of the IPython kernel.
Let’s start by making a new notebook. We can easily do this by clicking on the New drop-down list in the top- right corner of the dashboard. You see that you have the option to make a Python 3 notebook as well as a regular text file, a folder, and a terminal. Please select the Python 3 notebook option.
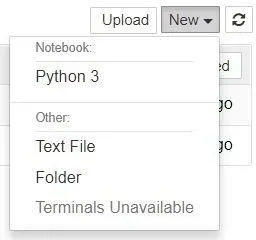
Image Source:Medium
Your Jupyter Notebook will open in a new tab as shown in the below image.
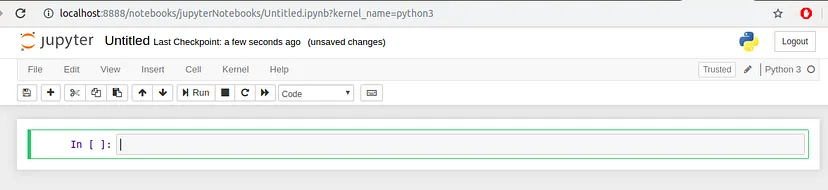
Image Source:Medium
Now each notebook uses its own tab so that you can open multiple notebooks simultaneously. If you switch back to the dashboard, you will see the new file Untitled.ipynb and you should see some green text that tells you your notebook is running.
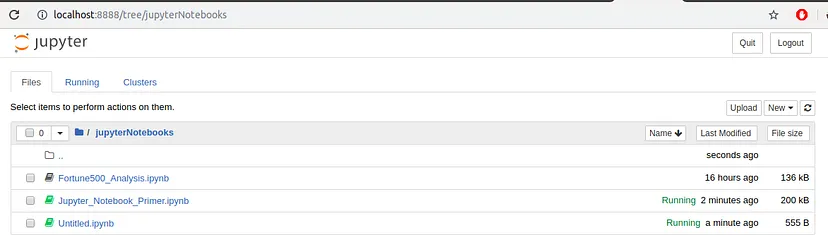
Image Source:Medium
Why a .ipynb file?
.ipynb is the standard file format for storing Jupyter Notebooks, hence the file name Untitled.ipynb. Let’s begin by first understanding what an .ipynb file is and what it might contain. Each .ipynb file is a text file that describes the contents of your notebook in a JSON format. Each cell and its contents, whether it be text, code or image attachments that have been converted into strings of text, is listed therein along with some additional metadata. You can edit the metadata yourself by selecting “Edit > Edit Notebook Metadata” from the menu bar in the notebook.
You can also view the contents of your notebook files by selecting “Edit” from the controls on the dashboard, there’s no reason to do so unless you really want to edit the file manually.
Understanding the Notebook Interface
Now that you have an open notebook in front of you take a look around. Check out the menus to see what the different options and functions are readily available, especially take some time out to scroll through the list of commands in the command palette, the small button with the keyboard icon (or just press Ctrl + Shift + P )
There are two prominent terminologies that you should care to learn about: cells and kernels are key both to understanding Jupyter and to what makes it more than just a content writing tool. Fortunately, these concepts are not difficult to understand.
A kernel is a program that interprets and executes the user’s code. The Jupyter Notebook App has an inbuilt kernel for Python code, but there are also kernels available for other programming languages.
A cell is a container for text to be displayed in the notebook or code to be executed by the notebook’s kernel.
Cells
Cells from the body of a notebook. In the screenshot for a new notebook(Untitled.ipynb) in the section above, the box with the green outline is an empty cell. There are 4 types of cells:
- Code :This is where you type your code and when executed the kernel will display its output below the cell.
- Markdown :This is where you type your text formatted using Markdown and the output is displayed in place when it is run.
- Raw NBConvert :It’s a command line tool to convert your notebook into another format (like HTML, PDF, etc.)
- Heading :This is where you add Headings to separate sections and make your notebook look tidy and neat. This has now been merged into the Markdown option itself. Adding a ‘#’ at the beginning ensures that whatever you type after that will be taken as a heading.
Let’s test out how the cells work with a classic hello world example. Type print(‘Hello World!’) into the cell and click the Run button in the toolbar above or press Ctrl + Enter.
When you run the cell, its output will is also displayed below and the label to its left changes from In[ ] to In[1] . Moreover, to signify that the cell is still running, Jupyter changes the label to In[*]
Additionally, it is important to note that the output of a code cell comes from any text data specifically printed during the execution of the cell, as well as the value of the last line in the cell, be it alone variable, a function call, or something else.
Markdown
Markdown is a lightweight, markup language for formatting plain text. Its syntax has a one-to-one correspondence with HTML tags. As this article has been written in a Jupyter notebook, all of the narrative text and images you can see are achieved in Markdown. Let’s cover the basics with a quick example.
When attaching images, you have three options:
- Use a URL to an image on the web.
- Use a local URL to an image that you will be kept alongside your notebook, such as in the same git repo.
- Add an attachment via “Edit > Insert Image”; this will convert the image into a string and store it inside your notebook .ipynb file.
- Note that adding an image as an attachment will make the .ipynb file much larger because it is stored inside the notebook in a string format.
There are a lot more features available in Markdown. Once you have familiarized yourself with the basics above, you can refer to the official guide from the creator, John Gruber, on his website.
Kernels
Behind every notebook runs a kernel. When you run a code cell, that code is executed within the kernel and any output is returned back to the cell to be displayed. The kernel’s state persists over time and between cells — it pertains to the document as a whole and not individual cells.
For example, if you import libraries or declare variables in one cell, they will be available in another. In this way, you can think of a notebook document as being somewhat comparable to a script file, except that it is multimedia. Let’s try to understand this with the help of an example. First, we’ll import a Python package and define a function.
Once we’ve executed the cell above, we can reference os, binascii and sum in any other cell.
The output should look something like this:
Majority of times, the flow in your notebook will be top-to-bottom, but it’s common to go back to make changes. In this case, the order of execution is stated to the left of each cell, such as In [2], will let you know whether any of your cells have stale output. And if you ever wish to reset things, there are several incredibly useful options from the Kernel menu:
- Restart: restarts the kernel, thus clearing all the variables, etc that were defined.
- Restart & Clear Output: same as above but will also wipe the output displayed below your code cells.
- Restart & Run All: same as above but will also run all your cells in order from first to last.
- Interrupt: If your kernel is ever stuck on computation and you wish to stop it, you can choose the Interrupt option.
Naming Your Notebooks
It is always a best practice to give a meaningful name to your notebooks. It may appear confusing, but you cannot name or rename your notebooks from the notebook app itself. You must use either the dashboard or your file browser to rename the .ipynb file. We’ll head back to the dashboard to rename the file we created earlier, which will have the default notebook file name Untitled.ipynb.
We cannot rename a notebook while it is running, so let’s first shut it down. The easiest way to do this is to select “File > Close and Halt” from the notebook menu. However, we can also shut down the kernel either by going to “Kernel > Shutdown” from within the notebook app or by selecting the notebook in the dashboard and clicking “Shutdown” (see images below).
Shutdown the kernel from Notebook App:
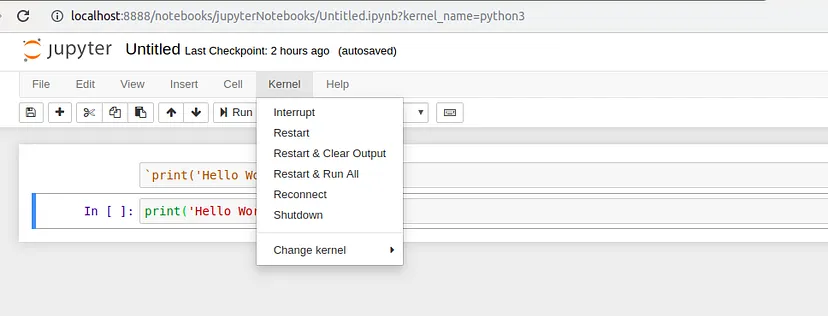
Image Source:Medium
Shutdown the kernel from Dashboard:
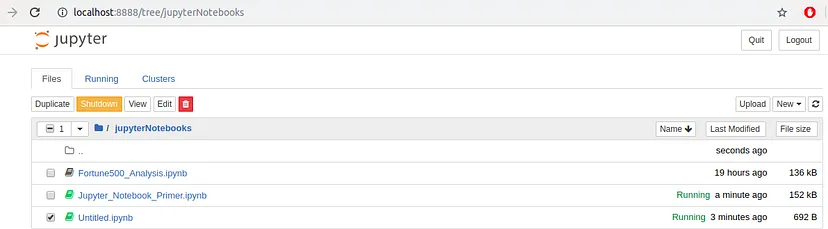
Image Source:Medium
Once the kernel has been shut down, you can then select your notebook and click “Rename” in the dashboard controls.
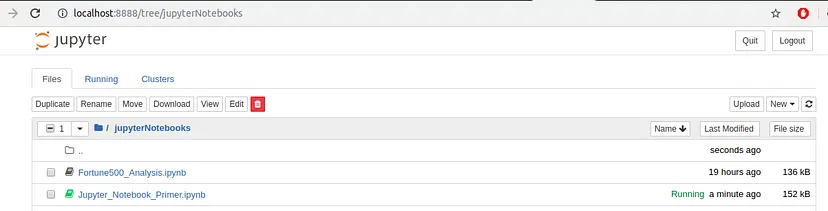
Image Source:Medium
Sharing Your Notebooks
When we talk about sharing a notebook, there are two things that might come to our mind. In most cases, we would want to share the end-result of the work, i.e. sharing non-interactive, pre-rendered version of the notebook, very much similar to this article; however, in some cases we might want to share the code and collaborate with others on notebooks with the aid of version control systems such as Git which is also possible.
Before You Start Sharing
A shared notebook will appear exactly in the state it was in when you export or save it, including the output of any code cells. Therefore, to ensure that your notebook is share-ready, so to speak, there are a few steps you should take before sharing:
- Click “Cell > All Output > Clear”
- Click “Kernel > Restart & Run All”
- Wait for your code cells to finish executing and check they did so as expected
This will ensure your notebooks don’t contain intermediary output, have a stale state, and executed in order at the time of sharing.
Exporting Your Notebooks
Jupyter has built-in support for exporting to HTML, Markdown and PDF as well as several other formats, which you can find from the menu under “File > Download as”. It is a very convenient way to share the results with others. But if sharing exported files doesn’t cut it for you, there are also some immensely popular methods of sharing .ipynb files more directly on the web.
GitHub
With home to over 2 million notebooks, GitHub is the most popular place for sharing Jupyter projects with the world. GitHub has integrated support for rendering .ipynb files directly both in repositories and gists on its website.
You can just follow the GitHub guides for you to get started on your own.
Nbviewer
NBViewer is one of the most popular notebook renderers on the web.
If you already have somewhere to host your Jupyter Notebooks online, be it GitHub or elsewhere, NBViewer will render your notebook and provide a shareable URL along with it. Provided as a free service as part of Project Jupyter, it is available at nbviewer.jupyter.org.
Data Manipulation and Analysis in Jupyter Notebook
Importing and Handling Various Data Formats
Jupyter Notebook seamlessly integrates with various data formats, enabling you to import and analyze data from different sources. Here's a breakdown of how to handle common data formats:
- Importing Comma-Separated Values (CSV) Files: CSV files are widely used for storing tabular data. To import a CSV file into a Jupyter Notebook, follow these steps:
- Working with JavaScript Object Notation (JSON) Files: JSON is a popular format for storing and exchanging structured data. To import JSON data into a Jupyter Notebook:
- Handling Excel Files: Excel files are commonly used for storing spreadsheet data. To import an Excel file into a Jupyter Notebook:
Performing Data Cleaning and Preprocessing Tasks
Data cleaning and preprocessing are essential steps in data analysis to ensure the quality and reliability of your results. Here are some common data cleaning and preprocessing tasks:
- Handling Missing Values: Missing values can be imputed using various techniques, such as mean or median imputation, or they can be dropped if necessary.
- Dealing with Outliers: Outliers can be identified and removed or corrected depending on the context of the data.
- Encoding Categorical Data: Categorical data can be encoded using techniques like one-hot encoding or label encoding to make it suitable for analysis.
- Standardizing or Normalizing Data: Standardization or normalization can be applied to numerical data to ensure consistent scales and improve the performance of algorithms.
Exploring and Visualizing Data Using Data Manipulation Libraries
Data exploration and visualization are crucial steps in understanding patterns and trends in your data.Jupyter Notebook offers various data manipulation libraries for this purpose:
- Pandas: Pandas is a powerful library for data manipulation and analysis. It provides functions for data cleaning, filtering, aggregation, and more.
- NumPy: NumPy provides efficient numerical operations and data structures, making it essential for scientific computing and data analysis.
- Matplotlib and Seaborn: Matplotlib and Seaborn are popular libraries for data visualization. They offer a wide range of plotting functions and customization options.
Organizing and Structuring Jupyter Notebooks
Effective organization and structure are essential for creating clear, maintainable, and reproducible Jupyter Notebooks. Here are some best practices to follow:
- Divide your notebook into sections: Use headings and subheadings to separate different stages of your analysis, such as data loading, data cleaning, exploratory data analysis, modeling, and results.
- Use descriptive cell names: Provide meaningful names for your code cells to quickly identify their purpose.
- Break down complex tasks into smaller functions: Avoid lengthy code blocks and instead define separate functions for reusable code segments.
- Utilize Markdown cells for explanations and annotations: Add Markdown cells to provide context, explain code blocks, and document your findings.
Version Control and Code Management for Jupyter Notebooks
Version control systems like Git are crucial for tracking changes, managing different versions of your notebook, and collaborating with others.
- Initialize a Git repository for your notebook: Create a Git repository to store your notebook and track its history
- Commit changes regularly: Make frequent commits to save your work and document the evolution of your analysis
- Use descriptive commit messages: Provide clear and concise explanations for each commit, highlighting significant changes or updates
- Branching and merging for collaboration: Utilize branching to work on separate features or experiments without affecting the main codebase. Merge branches when ready to integrate changes
Documenting and Commenting Code for Better Clarity and Reproducibility
Thorough documentation and comments enhance the readability, maintainability, and reproducibility of your Jupyter Notebooks.
- Add comments to explain code blocks: Provide clear and concise explanations within your code to elucidate its purpose and logic.
- Use descriptive variable names: Choose meaningful variable names that reflect their role and context in the code.
- Utilize documentation strings for functions: Document your functions using docstrings to explain their functionality, arguments, and return values.
- Add comments to explain data processing steps: Provide comments to clarify data cleaning, transformation, and manipulation procedures.
By following these documentation practices, you can ensure your notebooks are self-explanatory, easy to understand, and reproducible for future reference and collaboration.
Real-world Applications of Jupyter Notebook
Jupyter Notebook has become a versatile tool across various data science domains, offering a user-friendly and interactive environment for data analysis and exploration.
- Finance: Jupyter Notebook is widely used in financial analysis for tasks like portfolio optimization, risk assessment, and market forecasting.
- Healthcare: In the healthcare sector, Jupyter Notebook is employed for analyzing patient data, identifying disease patterns, and developing predictive models.
- Engineering: Engineering applications of Jupyter Notebook include data-driven design, simulation analysis, and machine learning-based optimization.
- Science: Jupyter Notebook serves as a valuable tool for scientists in fields like physics, chemistry, and biology to analyze experimental data, visualize results, and develop computational models.
- Education and Research: Jupyter Notebook is widely used in education and research settings for teaching data science concepts, conducting research, and sharing knowledge.
Exploring Jupyter Notebook-based Open-source Projects and Tools
The open-source community has developed a rich ecosystem of tools and projects that extend the capabilities of Jupyter Notebook:
- JupyterHub: JupyterHub allows for managing multiple Jupyter Notebook servers and providing a multi-user environment for collaboration
- Binder: Binder enables running Jupyter Notebooks directly from GitHub repositories, making them easily accessible and reproducible
- Papermill: Papermill facilitates automating Jupyter Notebook workflows and generating reports, making them more production-ready
- Nbconvert: Nbconvert allows converting Jupyter Notebooks into various formats, such as HTML, PDF, and Markdown, for sharing and publishing
- IPywidgets: IPywidgets provide interactive widgets for building data exploration interfaces and visualizations within Jupyter Notebooks
These open-source projects contribute to the versatility and adaptability of Jupyter Notebook, expanding its applications and enhancing its usability.