Introduction Last updated:
March 9, 2023, 6:21 p.m.
HTML (HyperText Markup Language) is a language used to create and structure web pages. It's the standard markup language for creating web pages and is used to describe the structure and content of a web page. HTML consists of a series of elements, each represented by a tag, which is used to define the structure and content of a web page.
An HTML document starts with a declaration indicating that the document is written in HTML, followed by the head section, which contains information about the document, such as its title, meta information, and links to other files such as CSS and JavaScript. The body section contains the actual content of the page, such as text, images, links, and other elements.
Selecting and using an editor
HTML editors are tools used to create and edit HTML code. They are designed to make it easier for people to create and manage HTML-based websites, without having to write code from scratch. There are different types of HTML editors, ranging from simple text editors with syntax highlighting, to WYSIWYG (What You See Is What You Get) editors that allow you to create web pages visually, without having to write any code.
Some popular HTML editors include Adobe Dreamweaver, Notepad++, and Sublime Text. WYSIWYG editors, such as Adobe Dreamweaver, provide a visual interface for creating and editing HTML code, making it easier for beginners to get started. On the other hand, text editors, such as Notepad++ and Sublime Text, provide a code-based interface for creating and editing HTML, making them a better choice for experienced developers.
When choosing an HTML editor, you should consider your needs and experience level. If you're new to HTML, a WYSIWYG editor might be a better choice, as it will provide you with a visual interface to work with. However, if you have experience with HTML and want more control over your code, a text editor might be a better choice. Regardless of which HTML editor you choose, the goal is to create a web page that is visually appealing, functional, and accessible to users.
Creating a new HTML file
Using Notepad (Windows)
Windows 8 and above :
Press the Windows key on your keyboard.
Type "Notepad" into the search box.
Click on "Notepad" in the search results to open it.
Alternatively, you can access Notepad from the Windows Start screen by clicking on the Windows Start button, then click on the "Windows Accessories" folder, and finally click on "Notepad".
Note
If you're using Windows 10, you can also open Notepad by right-clicking on the Windows Start button and selecting "Notepad" from the context menu.
Windows 7 and below :
Click on the Start button in the bottom-left corner of your screen.
Select "All Programs" from the start menu.
Find the "Accessories" folder in the list of programs and click on it.
Locate "Notepad" in the Accessories folder and click on it to open it.
Alternatively, you can also press the Windows key + R on your keyboard to open the Run dialog, type "notepad" in the Run dialog, and press Enter. This will open Notepad immediately.
Using Textedit (Mac)
Click on the "Finder" icon in the dock.
Click on "Applications" in the left-side panel.
Scroll down and find "TextEdit" in the list of applications.
Double-click on "TextEdit" to open it.
Alternatively, you can also use Spotlight Search to quickly launch TextEdit. To do this:
Press Command + Space on your keyboard.
Type "TextEdit" into the search field.
Select "TextEdit" from the list of search results.
Press Enter or double-click on "TextEdit" to open it.
Using Gedit (Linux/Gnome) Or Kwrite (Linux/Kde)
Here are the steps to open gedit in a Linux-based operating system:
Click on the "Applications" menu in the top left corner of your screen.
Scroll down and find "Accessories".
Click on "Text Editor" (or "gedit" if it's listed specifically).
Alternatively, you can open gedit from the terminal by following these steps:
Open the terminal.
Type "gedit" and press Enter.
Note
If gedit is not installed on your system, you can install it using your operating system's package manager. For example, on a Debian-based system, you can install gedit using the command "sudo apt-get install gedit".
Here are the steps to open KWrite in a Linux-based operating system:
Click on the "Applications" menu in the top left corner of your screen.
Scroll down and find "Development."
Click on "KWrite" (or "Text Editor" if it's listed specifically).
Alternatively, you can open KWrite from the terminal by following these steps:
Open the terminal.
Type "kwrite" and press Enter.
Note
If KWrite is not installed on your system, you can install it using your operating system's package manager. For example, on a Debian-based system, you can install KWrite using the command "sudo apt-get install kwrite".
Writing your first HTML page
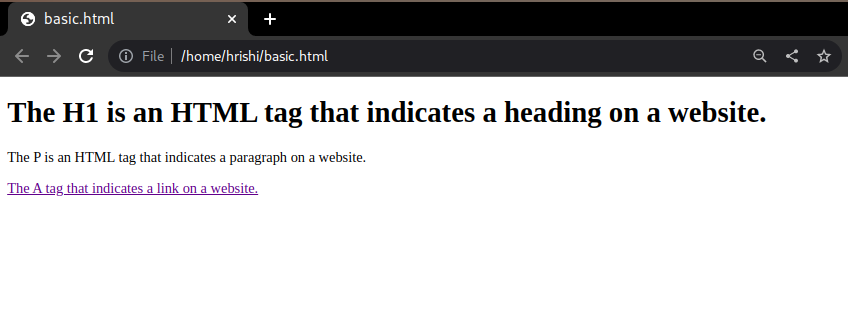
Write or Copy the following HTML code in your choice of editor.
<!DOCTYPE html>
<html>
<body>

<h1>The H1 is an HTML tag that indicates a heading on a website.</h1>
<p>The P is an HTML tag that indicates a paragraph on a website.</p>
<a href="https://docsallover.com">The A tag that indicates a link on a website.</a>

</body>
</html>
Save the HTML document with the extension .html or .htm
Open the saved HTML file in any browser (Double Click on the file OR Right Click > Open With)
We can make changes in the file and refresh the page in the browser to see the changes.
Basic Page Structure
The basic structure of an HTML document consists of several elements, each of which serves a specific purpose.At the very beginning of an HTML document, you'll usually see a DOCTYPE declaration, which tells the web browser which version of HTML the document uses.
After the doctype declaration, you'll typically see the HTML tags, which enclose all of the content in the document. Within the HTML tags, you'll find the <head> and <body> sections.
The <head> section is used to provide metadata about the document, such as the title of the page, any keywords associated with the page, and links to external resources such as stylesheets or scripts.
The <body> section is where the actual content of the page goes. This is where you'll use HTML tags to structure and format the content, such as creating paragraphs, headings, lists, and so on. The <body> section is also where you can add images, videos, and other media to your web page.
Within the <body> section, you'll use a variety of HTML tags to structure your content. For example, the paragraph tag is used to create paragraphs of text, while the heading tags (<h1> through <h6>) are used to create headings of different sizes. The image tag is used to embed images in your web page, and the anchor tag is used to create links to other pages or resources.
<!DOCTYPE html>
<html>
<head>
<title>Page Title</title>
</head>
<body>

<h1>The H1 is an HTML tag that indicates a heading on a website.</h1>
<p>The P is an HTML tag that indicates a paragraph on a website.</p>
<a href="https://docsallover.com">The A tag that indicates a link on a website.</a>

</body>
</html>
Overall, the basic structure of an HTML document is relatively straightforward, but it provides a powerful framework for creating rich and engaging web content. With just a few basic HTML tags, you can create a wide range of content types and styles, making HTML an essential skill for anyone interested in web development.
Common HTML Tags
The <!DOCTYPE> Declaration
The <!DOCTYPE html> tag is an important part of every HTML document, as it tells the web browser what version of HTML the document is written in. The doctype declaration must be placed at the very beginning of an HTML document, before the <html> tag.
Note
In older versions of HTML, different doctype declarations were used to indicate the specific version of HTML being used. For example, the doctype for HTML 4.01 was <!DOCTYPE HTML PUBLIC "-//W3C//DTD HTML 4.01//EN" "http://www.w3.org/TR/html4/strict.dtd">.
However, in modern HTML, the doctype declaration is much simpler and always set to <!DOCTYPE html>. This doctype declaration is known as the HTML5 doctype, and it is used to specify that the document conforms to the HTML5 standard.
<!DOCTYPE html>
It's important to include the doctype declaration in your HTML document, as it tells web browsers how to parse and display the document. Without a doctype declaration, web browsers may have difficulty rendering the document correctly, which can result in unexpected layout or behavior.
The <html> Tag
The <html> tag is one of the most important tags in HTML, as it is used to define the beginning and end of an HTML document. The opening tag <html> is typically placed at the beginning of an HTML document, while the closing tag </html> is placed at the end.
All other HTML elements must be placed within the <html> element. This includes the <head> and <body> elements, which are used to define the document's metadata and content, respectively.
The <html> element can also contain several attributes, including the lang attribute, which is used to specify the language of the document's content. For example, if you are creating a webpage in English, you would set the lang attribute to "en" like this: <html lang="en">.
It's important to note that the <html> element should always be included in an HTML document, as it defines the document type and provides a structure for the entire document. Without this element, the web browser may not be able to correctly parse and display the document.
The <head> Tag
The <head> tag is an essential HTML element that is used to define the head section of an HTML document. The head section contains information about the document that is not displayed in the web browser, such as the document's title, metadata, and scripts.
Some common elements that can be included within the <head> element include:
<title>: This element is used to define the title of the document, which appears in the browser's title bar or tab.
<meta>: This element is used to define metadata about the document, such as the author, description, and keywords. These metadata elements are not visible on the webpage but can be read by search engines and other applications.
<link>: This element is used to define links to external resources, such as stylesheets, icons, or other webpages.
<script>: This element is used to define scripts or code that will be executed by the web browser.
It's important to note that the <head> element must be included in every HTML document, even if it is empty. The contents of the <head> element are not visible on the webpage, but they are essential for search engine optimization (SEO) and for ensuring that the document is properly structured and accessible.
Overall, the <head> element is a critical component of any HTML document, as it defines important information about the document that is not displayed on the webpage itself.
The <title> Tag
The <title> tag is an important HTML element that is used to define the title of an HTML document. The text that is included within the <title> tags appears in the browser's title bar or tab, and is also used by search engines to display the title of the webpage in search results.
The <title> tag is typically placed within the <head> element, and it should be the first element within the <head> section. For example:
It's important to keep the title concise and descriptive, as it can help users and search engines quickly understand the content of the page. The title should be relevant to the content of the page, and it should include important keywords that users might search for.
In addition to helping with SEO and usability, a well-crafted title can also help attract users to your webpage, as it is often the first thing they see when browsing search results or navigating between browser tabs.
Overall, the <title> tag is an important element to include in any HTML document, as it helps define the purpose and content of the page, and it can have a significant impact on search engine rankings and user engagement.
The <body> Tag
The <body> tag is an essential HTML element that is used to define the main content of an HTML document. The text, images, videos, and other elements that are visible on a webpage are typically placed within the <body> tags.
Here is an example of a basic HTML document structure with the <body> tag:
<!DOCTYPE html>
<html>
<head>
  <title>My Webpage</title>
</head>
<body>
  <h1>Welcome to my webpage!</h1>
  <p>This is the main content of my webpage.</p>
  <img src="image.jpg" alt="A beautiful image">
</body>
</html>
As you can see, the <body> element is placed after the <head> element and contains all of the visible content for the webpage. This content can include headings, paragraphs, images, videos, links, forms, and other elements.
Note
It's important to note that the <body> element should only be used once within an HTML document. All visible content should be placed within this element.
In addition to defining the main content of the webpage, the <body> tag can also include various attributes that affect the behavior and appearance of the content, such as the bgcolor attribute to set the background color of the page, the text attribute to set the text color, and the link and vlink attributes to set the color of links.
Overall, the <body> tag is an essential element in HTML, as it defines the main content of the webpage and is where all visible content should be placed.
The Heading Tags <h1> Through <h6>
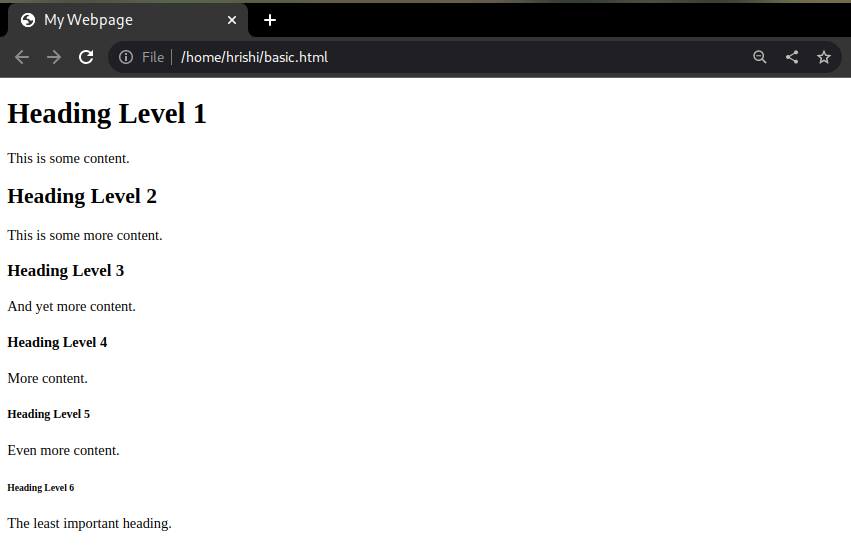
Heading tags in HTML are used to define the headings or titles of a webpage or a section of a webpage. There are six different levels of heading tags, ranging from <h1> to <h6>. <h1> is the largest and most important heading, while <h6> is the smallest and least important.
Here's an example of how heading tags are used in HTML:
<!DOCTYPE html>
<html>
<head>
  <title>My Webpage</title>
</head>
<body>
  <h1>Heading Level 1</h1>
  <p>This is some content.</p>

  <h2>Heading Level 2</h2>
  <p>This is some more content.</p>

  <h3>Heading Level 3</h3>
  <p>And yet more content.</p>

  <h4>Heading Level 4</h4>
  <p>More content.</p>

  <h5>Heading Level 5</h5>
  <p>Even more content.</p>

  <h6>Heading Level 6</h6>
  <p>The least important heading.</p>
</body>
</html>
Heading tags are important for structuring the content of a webpage and making it easier to read and understand. They also help search engines understand the content of the page and improve its SEO.
It's important to use heading tags in a logical and hierarchical order, starting with the main heading of the page as an <h1> tag and then using lower-level heading tags as subheadings. This helps to make the content easier to read and navigate.
HTML Standards
HTML standards refer to the specifications and rules that govern the creation of HTML documents, ensuring that webpages are consistent, reliable, and accessible across different devices and web browsers. The standards are maintained by the World Wide Web Consortium (W3C), an international community of experts dedicated to developing and improving web technologies.
There are several versions of HTML standards, including:
HTML 2.0: This was the first formal version of HTML, released in 1995. It introduced basic tags such as <html>, <head>, and <body>, and supported images, links, and tables.
HTML 3.2: This version was released in 1997 and introduced support for frames, background images, and form elements.
HTML 4.0: Released in 1997, this version introduced cascading style sheets (CSS), which allowed web developers to separate the content and structure of a webpage from its presentation.
XHTML 1.0: This version was released in 2000 and was based on XML syntax. It introduced stricter rules for document structure and syntax and required that all tags be properly closed.
HTML5: Released in 2014, HTML5 is the latest version of HTML and includes new features such as support for video and audio elements, semantic tags, and improved accessibility features.
It's important for web developers to follow the HTML standards when creating webpages to ensure that their pages are compatible with all web browsers and devices, and to improve the accessibility and usability of their content. Web browsers and search engines also use the standards to correctly display and interpret webpages.
The HTML standards also define guidelines for the proper use of markup and attributes, which help to ensure that webpages are semantically meaningful and accessible to users with disabilities. For example, HTML5 includes new semantic tags such as <header>, <footer>, <nav>, and <article>, which allow developers to mark up content in a more meaningful way. This can improve search engine optimization and make it easier for screen readers and other assistive technologies to interpret the content.
The HTML standards are also constantly evolving, with new features and improvements being added over time. The W3C regularly releases updates and revisions to the HTML specifications, and developers are encouraged to keep up-to-date with these changes to ensure that their webpages are using the latest best practices.
Overall, following HTML standards is an essential part of web development, as it ensures that webpages are well-structured, accessible, and compatible with a wide range of devices and web browsers. By following these guidelines, web developers can create high-quality, user-friendly webpages that are accessible to everyone, regardless of their device or abilities.
HTML Elements Last updated:
March 9, 2023, 6:21 p.m.
HTML elements are the building blocks of HTML documents. An element is defined by a start tag, some content, and an end tag. The content of the element can include text, other HTML elements, or a combination of both. Each HTML element has a specific purpose and function, such as defining headings, paragraphs, links, images, and more.
HTML elements are defined using tags, which are enclosed in angle brackets. For example, the <p> tag is used to define a paragraph, and the <a> tag is used to define a hyperlink. Each tag can also have attributes, which provide additional information about the element. For example, the <img> tag has an src attribute, which specifies the URL of the image to display.
HTML elements can be nested inside each other, meaning that one element can contain another element within it. This allows developers to create complex layouts and structures within their HTML documents. Additionally, HTML elements can be styled using CSS, which allows for even greater flexibility and control over the appearance of a webpage.
HTML Elements : Basics
HTML elements are the basic building blocks of any web page. They are defined using tags, which provide a structure and purpose to the content on the page.
Each HTML element has a specific function, such as defining headings, paragraphs, images, links, and more. Elements can also have attributes, which provide additional information about the element, such as the URL of an image or the destination of a hyperlink.
HTML elements can be combined and nested together to create complex layouts and structures, and can be styled using CSS to control their appearance on the page.
Here is an example of how HTML elements are used to structure and display content on a web page:
In summary, HTML elements are the foundation of any web page, and provide the structure and meaning to the content displayed on the page.
Heading Tags
Heading tags are HTML elements that are used to define the main headings or titles of a web page. There are six levels of headings in HTML, ranging from <h1> to <h6>. The <h1> tag is used for the main heading of the page, while the <h2> to <h6> tags are used for subheadings and other levels of hierarchy.
Here are some tips for using heading tags effectively:
Use only one <h1> tag per page: The <h1> tag should be used for the main heading of the page, and should only be used once per page. This helps search engines and users understand the main topic or purpose of the page.
Use hierarchical headings: Use the <h2> to <h6> tags to create a hierarchy of headings that helps users understand the structure and organization of the content on the page.
Use descriptive text: Make sure that the text used in the headings is descriptive and accurately reflects the content that follows. This helps users and search engines understand the context and relevance of the content.
Use CSS for styling: Use CSS to style the headings to match the design of your website. This can include changing the font size, color, and style of the text, as well as adding background images or other design elements.
Here is an example of how heading tags might be used on a web page:
<!DOCTYPE html>
<html>
<head>
	<title>My Web Page</title>
	<style>
		h1 {
			font-size: 36px;
			color: #333;
			margin-bottom: 20px;
		}

		h2 {
			font-size: 24px;
			color: #666;
			margin-bottom: 10px;
		}

		p {
			font-size: 18px;
			line-height: 1.5;
			color: #999;
		}
	</style>
</head>
<body>
	<header>
		<h1>Welcome to my website</h1>
	</header>

	<main>
		<section>
			<h2>About Me</h2>
			<p>Hi, my name is Jane and I\'m a web developer based in San Francisco. I specialize in creating responsive and user-friendly websites for small businesses and startups.</p>
		</section>

		<section>
			<h2>My Services</h2>
			<ul>
				<li>Web design and development</li>
				<li>SEO and digital marketing</li>
				<li>E-commerce solutions</li>
			</ul>
		</section>
	</main>
</body>
</html>
In this example, the <h1> tag is used for the main heading of the page, while the <h2> tag is used for subheadings. The headings are styled using CSS to match the design of the website.
Paragraphs
In HTML, a paragraph is a block of text that is separated from other blocks of text by a blank line or some other spacing. The paragraph element is represented by the <p> tag in HTML.
Here are some tips for using paragraphs effectively:
Keep paragraphs short: Paragraphs that are too long can be difficult to read and may cause users to lose interest in your content. Keep your paragraphs short and to the point, with a maximum of 4-5 sentences per paragraph.
Use descriptive and engaging language: Your paragraphs should be well-written and engaging to keep users interested in your content. Use descriptive language to paint a picture for your readers and make your content more interesting.
Use subheadings to break up content: If you have a lot of text on a page, consider breaking it up into sections with subheadings. This can make it easier for users to scan your content and find what they're looking for.
Use formatting to make text stand out: You can use formatting, such as bold or italic text, to make important points stand out within your paragraphs. This can help draw users' attention to key information.
Here is an example of how paragraphs might be used on a web page:
<!DOCTYPE html>
<html>

<head>
  <title>My Web Page</title>
  <style>
    h1 {
      font-size: 36px;
      color: #333;
      margin-bottom: 20px;
    }

    p {
      font-size: 18px;
      line-height: 1.5;
      color: #666;
    }

    strong {
      font-weight: bold;
    }
  </style>
</head>

<body>
  <header>
    <h1>Welcome to my website</h1>
  </header>

  <main>
    <section>
      <h2>About Me</h2>
      <p>Hi, my name is Jane and I\'m a web developer based in San Francisco. I specialize in creating responsive and user-friendly websites for small businesses and startups.</p>
      <p>I have over 5 years of experience in the industry and have worked on a variety of projects, including e-commerce websites, landing pages, and mobile apps. My goal is to provide high-quality web development services at an affordable price.</p>
    </section>

    <section>
      <h2>My Services</h2>
      <p>Here are some of the services I offer:</p>
      <ul>
        <li><strong>Web design and development:</strong> I can create a custom website from scratch or redesign an existing website to make it more modern and user-friendly.</li>
        <li><strong>SEO and digital marketing:</strong> I can help you improve your website\'s search engine rankings and drive more traffic to your site.</li>
        <li><strong>E-commerce solutions:</strong> I can help you set up an online store and integrate it with popular payment processors like PayPal and Stripe.</li>
      </ul>
    </section>
  </main>
</body>

</html>
In this example, paragraphs are used to provide more detailed information about the web developer and the services she offers. The paragraphs are styled using CSS to make them easy to read and engaging. Strong tags are used to make important points stand out.
Links
HTML links are created using the anchor tag <a> with the href attribute. The href attribute specifies the URL or file location of the page or resource that the link points to. Here is an example of an HTML link:
<a href="https://www.example.com">Click here to go to Example.com</a>
In this example, the anchor tag <a> creates the link, and the href attribute specifies the URL "https://www.example.com". The text "Click here to go to Example.com" is the clickable text that the user sees. When the user clicks on this link, it will take them to the Example.com website.
You can also use HTML links to link to other pages within the same website by using relative URLs. For example, if you wanted to link to a page called "about.html" in the same directory as your current page, you would use the following code:
<a href="about.html">Click here to go to the About page</a>
This code will create a link to the "about.html" page in the same directory as the current page. When the user clicks on this link, it will take them to the About page within the same website.
Images
HTML images are used to display images on a web page. Images are inserted using the <img> tag in HTML. The <img> tag requires the src attribute, which specifies the URL or file location of the image.
In this example, the <img> tag creates the image, and the src attribute specifies the URL "https://www.example.com/image.jpg" of the image. The alt attribute provides alternative text that is displayed if the image cannot be loaded, or for accessibility purposes.
You can also add additional attributes to the <img> tag to specify the size of the image, the alignment, or to add a border, among other things. For example:
This code will create an image with a width of 300 pixels, a height of 200 pixels, aligned to the right of the page, and with a 1 pixel border.
Note that it's important to use images responsibly and optimize them for web use to ensure that they load quickly and don't slow down the page.
List Tags
HTML lists are used to display items in a list format on a web page. There are three types of HTML lists: ordered lists, unordered lists, and definition lists.
Ordered lists are used to display a numbered list of items in a particular order. They are created using the <ol> tag and each item is represented by the <li> tag. Here is an example:
In this example, the <ol> tag creates the ordered list, and each item is represented by the <li> tag. When the page is rendered, the items will be displayed as follows:
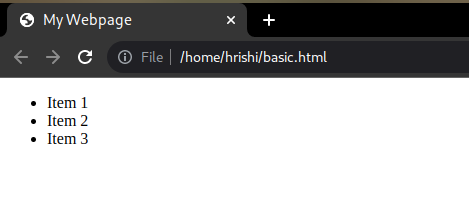
Unordered lists are used to display a bulleted list of items. They are created using the <ul> tag and each item is represented by the <li> tag. Here is an example:
In this example, the <ul> tag creates the unordered list, and each item is represented by the <li> tag. When the page is rendered, the items will be displayed as follows:
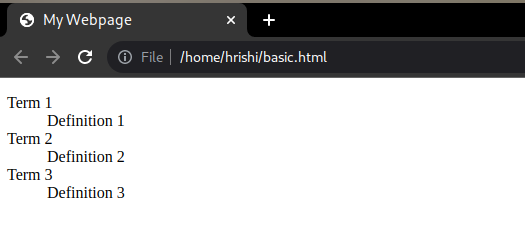
Definition lists are used to display a list of terms and their definitions. They are created using the <dl> tag, and each term and definition is represented by the <dt> and <dd> tags, respectively. Here is an example:
In this example, the <dl> tag creates the definition list, and each term is represented by the <dt> tag and each definition is represented by the <dd> tag. When the page is rendered, the terms and definitions will be displayed as follows:
Forms
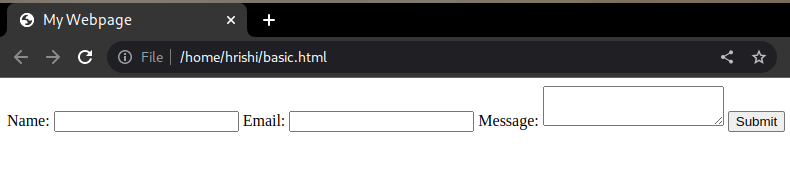
HTML forms are used to collect input from users on a web page. Forms are created using the <form> tag, and various form elements such as text inputs, checkboxes, and dropdown menus are added to the form using different tags.
In this example, the <form> tag creates the form, and the action attribute specifies the URL or file location where the form data will be submitted. The method attribute specifies the HTTP method to be used for the form submission (in this case, "post").
The form includes three form elements: a text input for the user's name, an email input for the user's email address, and a textarea for the user's message. Each form element is associated with a label using the <lable> tag, which improves accessibility for users.
Finally, the form includes a submit button, which is created using the <input> tag with the type attribute set to "submit". When the user clicks this button, the form data is submitted to the URL specified in the action attribute.
Note that forms can include many other types of form elements, such as checkboxes, radio buttons, and dropdown menus, and can be customized with various attributes and styles.
HTML Attributes Last updated:
March 9, 2023, 6:26 p.m.
HTML attributes are special characteristics or properties that can be added to HTML elements to define their behavior, appearance, or functionality. These attributes provide additional information about the element, such as its ID, class, source URL, target URL, alternate text, or style.
Attributes can be applied to almost any HTML element, including text, images, links, forms, tables, and more. They are defined using specific syntax within the element's opening tag, and may have values assigned to them as needed.
Attributes are an important part of HTML coding, as they allow web developers to create rich, interactive, and dynamic web pages that are both visually appealing and functional. By using attributes effectively, developers can enhance the user experience and optimize their websites for accessibility, search engine optimization, and other purposes.
Id attribute
The id attribute in HTML is used to uniquely identify an HTML element on a web page. This attribute is typically used to target specific elements with CSS or JavaScript, or to create internal page links that navigate to specific parts of the page.
Here is an example of how to use the id attribute:
<h1 id="main-heading">Welcome to My Website</h1>
In this example, the h1 element has been assigned an id attribute with a value of "main-heading". This means that we can refer to this element by its ID using CSS or JavaScript.
For instance, to change the font color of this heading using CSS, we can target it with the #main-heading selector like this:
#main-heading { color: blue; }
Similarly, we can create a link to this section of the page using the a element and the href attribute like this:
<a href="#main-heading">Jump to Main Heading</a>
This link will take the user to the h1 element with an id of "main-heading" when clicked, which can be especially useful for longer pages where it is helpful to provide navigation options.
Class attribute
The class attribute in HTML is used to specify one or more classes that an HTML element belongs to. This attribute is typically used to apply styles or scripts to specific groups of elements with common characteristics.
Here is an example of how to use the class attribute:
<p class="important">This is an important paragraph.</p>
<p class="important">This is also an important paragraph.</p>
<p>This paragraph is not important.</p>
In this example, both the first and second p elements have been assigned a class attribute with a value of "important". This means that we can apply styles or scripts to both of these paragraphs at the same time.
For instance, to change the font color of all elements with a class of "important" using CSS, we can target them with the .important selector like this:
.important { color: red; }
Similarly, we can target elements with specific classes using JavaScript, such as to add or remove classes dynamically based on user interactions.
// Add a class to all elements with a class of "important"
document.querySelectorAll('.important').forEach(element => {
  element.classList.add('highlighted');
});
Overall, the class attribute is a useful way to group and manipulate elements based on shared characteristics, and can help streamline the styling and scripting of complex web pages.
Src attribute
The src attribute in HTML is used to specify the URL of an external resource, such as an image, audio, video, or script, that should be embedded in the web page.
Here is an example of how to use the src attribute to embed an image in a web page:
In this example, the img element has been assigned a src attribute with a value of "https://example.com/images/my-image.jpg". This tells the browser to load the image from that URL and display it in the web page.
We can also use the src attribute to embed other types of resources, such as audio or video files:
<audio controls src="https://example.com/audio/my-audio.mp3">
  Your browser does not support the audio tag.
</audio>
In this example, the audio element has been assigned a src attribute with a value of "https://example.com/audio/my-audio.mp3". This tells the browser to load the audio file from that URL and display it in the web page, along with a set of playback controls.
Overall, the src attribute is a powerful tool for embedding external resources in web pages, and can be used to enhance the user experience by providing rich multimedia content.
Href attribute
The href attribute in HTML is used to specify the URL of the destination that a hyperlink should navigate to. This attribute is typically used with the a element to create clickable links on a web page.
Here is an example of how to use the href attribute to create a hyperlink:
In this example, the a element has been assigned an href attribute with a value of "https://example.com". This tells the browser to create a clickable link that, when clicked, will navigate the user to the URL specified in the href attribute.
We can also use the href attribute to create internal page links that navigate to specific sections of the same web page:
<a href="#section1">Jump to Section 1</a>
In this example, the a element has been assigned an href attribute with a value of "#section1". This tells the browser to create a clickable link that, when clicked, will navigate the user to the section of the page with an ID of "section1".
Overall, the href attribute is a key tool for creating navigation and interactivity in web pages, and can be used to link to other pages, internal sections of a page, email addresses, and more.
Alt attribute
The alt attribute in HTML is used to provide alternative text for an image if it cannot be displayed. This attribute is important for accessibility, as it allows screen readers to read a description of the image to users who may not be able to see it.
Here is an example of how to use the alt attribute to provide alternative text for an image:
In this example, the img element has been assigned an alt attribute with a value of "A beautiful landscape". This tells the browser to display the image with the specified src attribute, but to also provide the alternative text "A beautiful landscape" if the image cannot be displayed.
It's important to note that the alt attribute is not just for accessibility purposes. It can also be used to provide additional context about an image, even if it can be displayed. For example:
<img src="https://example.com/images/my-image.jpg" alt="A beautiful landscape near the beach, with palm trees and blue sky">
In this example, the alt attribute provides a more detailed description of the image, which may be helpful for users who can see the image, but want more information about it.
Overall, the alt attribute is a key tool for providing alternative text for images, which is important for accessibility and for providing additional context to users.
Title attribute
The title attribute in HTML is used to provide additional information about an element, typically in the form of a tooltip that appears when the user hovers over the element.
Here is an example of how to use the title attribute to provide a tooltip for an element:
<button title="Click me to submit the form">Submit</button>
In this example, the button element has been assigned a title attribute with a value of "Click me to submit the form". This tells the browser to display a tooltip with that text when the user hovers over the button.
The title attribute can also be used with other elements, such as a (for hyperlinks) and img (for images). For example:
<a href="https://example.com" title="Visit Example.com">Example.com</a>
<img src="https://example.com/images/my-image.jpg" alt="A beautiful landscape" title="Photo by John Doe">
In these examples, the a and img elements have been assigned title attributes to provide additional information about the hyperlink and image, respectively.
Overall, the title attribute is a useful tool for providing additional information about elements on a web page, and can enhance the user experience by providing context and helpful hints.
Style attribute
The style attribute in HTML is used to apply inline styles to an element. Inline styles are styles that are applied directly to an individual element, rather than being defined in an external CSS file or a style element in the HTML document.
Here is an example of how to use the style attribute to apply a color style to a p element:
<p style="color: red;">This text will be red.</p>
In this example, the p element has been assigned a style attribute with a value of color: red;. This tells the browser to apply the color style to the p element, making the text inside it red.
Inline styles can also be used to apply other CSS styles, such as font size, background color, and text alignment. For example:
In this example, the h1 element has been assigned a style attribute with multiple styles defined, including font-size, background-color, and text-align. This tells the browser to apply those styles to the h1 element.
It's important to note that while inline styles can be useful for making quick style adjustments, it's generally recommended to use external CSS files or a style element in the HTML document to define styles that apply to multiple elements on a web page.
Overall, the style attribute is a tool for applying inline styles to individual elements in HTML, allowing for quick and easy adjustments to specific styles.
HTML Text Formatting Last updated:
March 9, 2023, 7:42 p.m.
HTML text formatting refers to the various ways in which text can be visually styled and arranged on a web page using HTML. This includes changing the font family and size, setting text in bold or italic, creating lists, and aligning text within a page or element.
Strong tag
The <strong> tag is an HTML text formatting tag that is used to indicate strong importance. It is typically used to make text stand out and draw attention to it. When the <strong> tag is used, the text inside the tag is rendered in bold.
Here is an example of how to use the <strong> tag in HTML:
<p>This is a <strong>very important</strong> message.</p>
In this example, the text "very important" is enclosed in a <strong> tag. When the HTML code is rendered in a web browser, the text "very important" will be displayed in bold.
Here's what it will look like in the browser:
The <strong> tag is commonly used to highlight important information in articles, news stories, and other types of content. It can also be used to emphasize certain words or phrases in headings or subheadings to make them stand out to readers.
Em tag
The <em> tag is an HTML text formatting tag that is used to indicate emphasis. It is typically used to make text stand out and draw attention to it. When the <em> tag is used, the text inside the tag is rendered in italic.
Here is an example of how to use the <em> tag in HTML:
<p>This is an <em>important</em> message.</p>
In this example, the text "important" is enclosed in an <em> tag. When the HTML code is rendered in a web browser, the text "important" will be displayed in italic.
Here's what it will look like in the browser:
The <em> tag is commonly used to emphasize certain words or phrases in a sentence to make them stand out to readers. It can also be used to convey subtle nuances in meaning or tone, such as sarcasm or irony.
It's important to note that the <em> tag is different from the <strong> tag, which is used to indicate strong importance and is typically rendered in bold. While both tags are used to make text stand out, the <em> tag is used for emphasis, while the <strong> tag is used for strong importance.
U tag
The <u> tag is an HTML text formatting tag that is used to underline text. It is typically used to make text stand out and draw attention to it. When the <u> tag is used, the text inside the tag is rendered with an underline.
Here is an example of how to use the <u> tag in HTML:
<p>This text is <u>underlined</u>.</p>
In this example, the text "underlined" is enclosed in a <u> tag. When the HTML code is rendered in a web browser, the text "underlined" will be displayed with an underline.
Here's what it will look like in the browser:
The <u> tag is commonly used to indicate that text is important or needs to be emphasized. It can also be used to distinguish links from regular text in a document.
However, it's important to use the <u> tag sparingly and for specific purposes, as overuse of underlining can make text difficult to read and can detract from the overall design and readability of a document.
It's also worth noting that the HTML5 specification suggests using the CSS text-decoration property instead of the <u> tag to style text with an underline, as it provides more flexibility and control over the style of underlined text.
S tag
The <s> tag is an HTML text formatting tag that is used to indicate that text has been struck through, or "crossed out." It is typically used to indicate that the text is no longer valid or relevant. When the <s> tag is used, the text inside the tag is rendered with a line through it.
Here is an example of how to use the <s> tag in HTML:
<p>This text is <s>no longer relevant</s>.</p>
In this example, the text "no longer relevant" is enclosed in an <s> tag. When the HTML code is rendered in a web browser, the text "no longer relevant" will be displayed with a line through it.
Here's what it will look like in the browser:
The <s> tag is commonly used to indicate that text has been removed or crossed out, such as in a document that has been revised or edited. It can also be used to indicate that certain information is no longer accurate or applicable.
However, it's important to use the <s> tag sparingly and for specific purposes, as overuse of crossed-out text can make a document difficult to read and can detract from its overall clarity and message.
Sub tag
The <sub> tag is an HTML text formatting tag that is used to create subscript text, which is typically smaller in size and positioned below the baseline of the surrounding text. It is commonly used for mathematical and chemical formulas, as well as for footnotes and abbreviations. When the <sub> tag is used, the text inside the tag is rendered as subscript.
Here is an example of how to use the <sub> tag in HTML:
<p>The chemical formula for water is H<sub>2</sub>O.</p>
In this example, the number "2" is enclosed in a <sub> tag. When the HTML code is rendered in a web browser, the number "2" will be displayed in subscript below the "H" in "H2O".
Here's what it will look like in the browser:
Overall, the <sub> tag is a useful HTML text formatting tag for creating subscript text and providing additional context in a document.
Sup tag
The <sup> tag is an HTML text formatting tag that is used to create superscript text, which is typically smaller in size and positioned above the baseline of the surrounding text. It is commonly used for mathematical and chemical formulas, as well as for footnotes and references. When the <sup> tag is used, the text inside the tag is rendered as superscript.
Here is an example of how to use the <sup> tag in HTML:
<p>The formula for the area of a circle is A = π<sup>r</sup><sup>2</sup>.</p>
In this example, the "r" and "2" are enclosed in separate <sup> tags. When the HTML code is rendered in a web browser, the "r" and "2" will be displayed in superscript above the "π" and next to each other.
Here's what it will look like in the browser:
The <sup> tag can also be used to create footnotes and references, where the superscript text provides additional information or context.
For example:
<p>The Earth is the third planet from the Sun<sup>[1]</sup>.</p>

<ol>
  <li>The Sun is the center of the solar system.</li>
  <li>Mercury is the closest planet to the Sun.</li>
  <li>Venus is the second planet from the Sun.</li>
  <li>The Earth is the third planet from the Sun.</li>
</ol>
In this example, the superscript "[1]" is enclosed in a <sup> tag and indicates a reference to a footnote. The actual footnote would be located at the bottom of the page or document, providing additional information or context for the statement in the main text.
Overall, the <sup> tag is a useful HTML text formatting tag for creating superscript text and providing additional context in a document.
Mark tag
The <mark> tag is an HTML text formatting tag that is used to highlight and emphasize text by applying a background color to it. It is commonly used to draw attention to a specific word or phrase in a document. When the <mark> tag is used, the text inside the tag is rendered with a colored background.
Here is an example of how to use the <mark> tag in HTML:
<p>Please remember to <mark>bring your passport</mark> with you when traveling abroad.</p>
In this example, the phrase "bring your passport" is enclosed in a <mark> tag. When the HTML code is rendered in a web browser, the phrase "bring your passport" will be highlighted with a colored background, drawing attention to it.
Here's what it will look like in the browser:
The <mark> tag can also be used to highlight search terms or keywords in a document, making it easier for users to find relevant information.
For example:
<p>Search results for "HTML":</p>
<ul>
<li><mark>HTML</mark> is the standard markup language for creating web pages.</li>
<li>The <mark>HTML</mark> code for a hyperlink is <a href="url">link text</a>.</li>
<li>There are many <mark>HTML</mark> editors available for creating web pages.</li>
</ul>
In this example, the search term "HTML" is enclosed in a <mark> tag and applied to each instance of the term in the search results list. When the HTML code is rendered in a web browser, the term "HTML" in each list item will be highlighted with a colored background, making it easier for the user to quickly scan and find relevant information.
Overall, the <mark> tag is a useful HTML text formatting tag for highlighting and emphasizing specific text in a document.
Code tag
The <code> tag is an HTML text formatting tag that is used to display computer code or programming code in a document. It is commonly used to differentiate code from regular text and to provide visual cues that help readers understand how the code should be interpreted. When the <code> tag is used, the text inside the tag is rendered in a monospace font, which preserves the formatting and layout of the code.
Here is an example of how to use the <code> tag in HTML:
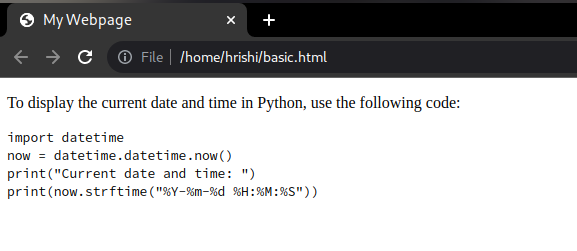
<p>To display the current date and time in Python, use the following code:</p>

<code>
import datetime<br>
now = datetime.datetime.now()<br>
print("Current date and time: ")<br>
print(now.strftime("%Y-%m-%d %H:%M:%S"))<br>
</code>
In this example, the Python code is enclosed in a <code> tag. When the HTML code is rendered in a web browser, the code will be displayed in a monospace font, preserving the formatting and layout of the code. Additionally, the code will be visually differentiated from the regular text, making it easier to read and understand.
Here's what it will look like in the browser:
The <code> tag can also be used to display inline code snippets or individual code elements, such as function names, variable names, or command-line arguments.
For example:
<p>To change the font size in HTML, use the <code><font size="size"></code> tag.</p>
In this example, the HTML code element <font size="size"> is enclosed in a <code> tag. When the HTML code is rendered in a web browser, the code element will be displayed in a monospace font, making it easier to differentiate from the regular text and emphasizing its significance as a code element.
Overall, the <code> tag is a useful HTML text formatting tag for displaying computer code or programming code in a document, making it easier to read and understand for both developers and non-developers.
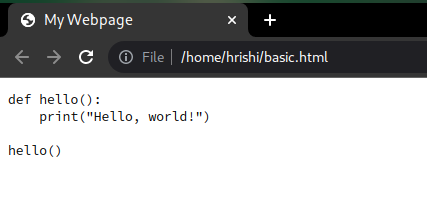
Pre tag
The <pre> tag is an HTML text formatting tag that is used to display preformatted text in a document. It is commonly used to display code blocks, ASCII art, or any other text that requires a fixed-width font and preserved white space. When the <pre> tag is used, the text inside the tag is rendered exactly as it appears in the HTML code, preserving any white space, line breaks, or indentation.
Here is an example of how to use the <pre> tag in HTML:
In this example, the Python code block is enclosed in a <pre> tag. When the HTML code is rendered in a web browser, the code block will be displayed exactly as it appears in the HTML code, with preserved white space, line breaks, and indentation. Additionally, the text will be displayed in a fixed-width font, making it easier to read and understand.
Here's what it will look like in the browser:
The <pre> tag can also be used to display ASCII art, diagrams, or any other text that requires a fixed-width font and preserved white space.
In this example, the ASCII art of a camel is enclosed in a <pre> tag. When the HTML code is rendered in a web browser, the ASCII art will be displayed exactly as it appears in the HTML code, with preserved white space and a fixed-width font, making it easier to read and appreciate as an art form.
Overall, the <pre> tag is a useful HTML text formatting tag for displaying preformatted text in a document, preserving the white space, line breaks, and indentation, and displaying the text in a fixed-width font that makes it easier to read and understand.
Blockquote tag
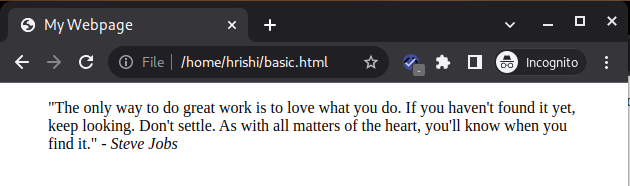
The <blockquote> tag is an HTML text formatting tag that is used to indicate a block of quoted text in a document. It is commonly used to highlight a quotation from another source, such as a book, article, or speech. When the <blockquote> tag is used, the text inside the tag is typically indented and displayed with quotation marks or other visual cues to indicate that it is a quotation.
Here is an example of how to use the <blockquote> tag in HTML:
<blockquote>
    "The only way to do great work is to love what you do. If you haven't found it yet, keep looking. Don't settle. As with all matters of the heart, you'll know when you find it."
    <cite>- Steve Jobs</cite>
</blockquote>
In this example, the quotation from Steve Jobs is enclosed in a <blockquote> tag. The citation is enclosed in a <cite> tag, which is used to indicate the source of the quotation. When the HTML code is rendered in a web browser, the quotation will be displayed in an indented block with quotation marks, and the citation will be displayed with a different font or style, making it easier to read and understand.
Here's what it will look like in the browser:
The <blockquote> tag can also be used to highlight a section of text that is especially important or noteworthy, even if it is not a direct quotation from another source.
For example:
<blockquote>
    In today's society, it is more important than ever to prioritize mental health and well-being. Whether you are struggling with stress, anxiety, depression, or any other mental health issue, there is help available. Don\'t be afraid to reach out and seek the support you need.
</blockquote>
In this example, the text about mental health is enclosed in a <blockquote> tag. When the HTML code is rendered in a web browser, the text will be displayed in an indented block, making it stand out from the rest of the text and emphasizing its importance.
Overall, the <blockquote> tag is a useful HTML text formatting tag for indicating a block of quoted text in a document, making it easier to read and understand, and providing visual cues that help readers differentiate the quotation from the rest of the text.
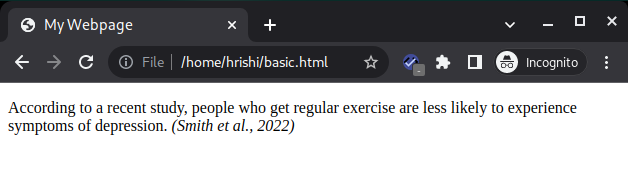
Cite tag
The <cite> tag is an HTML text formatting tag that is used to indicate a citation or reference to a work in a document. It is commonly used to cite a book, article, or other source of information in a document. When the <cite> tag is used, the text inside the tag is typically displayed in a different font or style to indicate that it is a citation.
Here is an example of how to use the <cite> tag in HTML:
<p>
    According to a recent study, people who get regular exercise are less likely to experience symptoms of depression. <cite>(Smith et al., 2022)</cite>
</p>
In this example, the citation for a study is enclosed in a <cite> tag. When the HTML code is rendered in a web browser, the citation will be displayed in a different font or style, making it easier to differentiate from the rest of the text.
Here's what it will look like in the browser:
The <cite> tag can also be used to indicate the title of a work, such as a book or article.
For example:
<p>
    In his article "The Power of Positive Thinking," Norman Vincent Peale argues that a positive attitude can help people overcome adversity and achieve success. <cite>The Power of Positive Thinking</cite>
</p>
In this example, the title of an article is enclosed in a <cite> tag. When the HTML code is rendered in a web browser, the title will be displayed in a different font or style, making it easier to differentiate from the rest of the text.
Overall, the <cite> tag is a useful HTML text formatting tag for indicating a citation or reference to a work in a document, making it easier to read and understand, and providing visual cues that help readers differentiate the citation from the rest of the text.
Abbr tag
The <abbr> tag is an HTML text formatting tag that is used to indicate an abbreviation or acronym in a document. It is commonly used to provide an explanation or definition of an abbreviation or acronym that may not be immediately familiar to readers.
Here is an example of how to use the <abbr> tag in HTML:
<p>
    The <abbr title="World Health Organization">WHO</abbr> is a specialized agency of the United Nations responsible for international public health.
</p>
In this example, the abbreviation "WHO" is enclosed in an <abbr> tag, with the full name of the organization provided as the value of the title attribute. When the HTML code is rendered in a web browser, hovering over the abbreviation will display a tooltip with the full name of the organization.
Here's what it will look like in the browser:
The <abbr> tag can also be used to indicate the abbreviation or acronym of a technical term or jargon that may not be familiar to readers.
For example:
<p>
    The <abbr title="Hypertext Markup Language">HTML</abbr> is the standard markup language used to create web pages.
</p>
In this example, the abbreviation "HTML" is enclosed in an <abbr> tag, with the full name of the language provided as the value of the title attribute. When the HTML code is rendered in a web browser, hovering over the abbreviation will display a tooltip with the full name of the language.
Overall, the <abbr> tag is a useful HTML text formatting tag for indicating an abbreviation or acronym in a document, providing additional information and context for readers, and improving the accessibility and usability of the document.
Q tag
The <q> tag is an HTML text formatting tag that is used to indicate a short quotation in a document. It is commonly used to include a quotation within a paragraph or block of text.
Here is an example of how to use the <q> tag in HTML:
<p>
    As Albert Einstein famously said, <q>Imagination is more important than knowledge.</q> This quote reminds us that creativity and innovation are crucial to progress and success.
</p>
In this example, the quotation "Imagination is more important than knowledge" is enclosed in a <q> tag. When the HTML code is rendered in a web browser, the quotation will be displayed in quotation marks and with any necessary formatting, such as indentation or line breaks.
Here's what it will look like in the browser:
The <q> tag can also be used to indicate a quotation that is part of a larger block of text.
For example:
<blockquote>
    <p>
        In his famous "I Have a Dream" speech, Martin Luther King Jr. said: <q>I have a dream that my four little children will one day live in a nation where they will not be judged by the color of their skin but by the content of their character.</q>
    </p>
</blockquote>
In this example, the quotation "I have a dream that my four little children will one day live in a nation where they will not be judged by the color of their skin but by the content of their character" is enclosed in a <q> tag within a <blockquote> tag. When the HTML code is rendered in a web browser, the quotation will be displayed with any necessary formatting, such as indentation or line breaks.
Overall, the <q> tag is a useful HTML text formatting tag for indicating a short quotation in a document, making it easier to read and understand, and providing visual cues that help readers differentiate the quotation from the rest of the text.
Small tag
The <small> tag is an HTML text formatting tag that is used to indicate smaller text in a document. It is commonly used to indicate disclaimers, fine print, copyright notices, or any other text that should be displayed in a smaller font size.
Here is an example of how to use the <small> tag in HTML:
<p>
    All prices are in US dollars and are subject to change without notice. <small>Taxes and shipping not included.</small>
</p>
In this example, the disclaimer "Taxes and shipping not included" is enclosed in a <small> tag. When the HTML code is rendered in a web browser, the text inside the <small> tag will be displayed in a smaller font size than the rest of the text.
Here's what it will look like in the browser:
The <small> tag can also be used to indicate text that is less important or less prominent than other text on the page.
For example:
<h1>Welcome to my blog!</h1>
<p>
    In this post, I'll be discussing some of my favorite books. <small>Please note that these are just my personal opinions.</small>
</p>
In this example, the disclaimer "Please note that these are just my personal opinions" is enclosed in a <small> tag. When the HTML code is rendered in a web browser, the text inside the <small> tag will be displayed in a smaller font size than the rest of the text.
Overall, the <small> tag is a useful HTML text formatting tag for indicating smaller text in a document, making it easier to read and understand, and providing visual cues that help readers differentiate between different types of text on the page.
Span tag
The <span> tag is an HTML text formatting tag that is used to group inline elements and apply styles or formatting to them. It is a very versatile tag and can be used for a wide range of purposes, such as styling specific words or phrases within a paragraph, applying a background color to a block of text, or grouping multiple inline elements together.
Here is an example of how to use the <span> tag in HTML:
<p>
    The <span style="font-weight: bold;">quick brown fox</span> jumps over the lazy dog.
</p>
In this example, the words "quick brown fox" are enclosed in a <span> tag with a style attribute that sets the font weight to bold. When the HTML code is rendered in a web browser, the words "quick brown fox" will be displayed in bold font.
Here's what it will look like in the browser:
The <span> tag can also be used to group multiple inline elements together and apply styles or formatting to them collectively.
For example:
<p>
    Please <span style="color: red;">do not</span> touch the red button.
</p>
In this example, the phrase "do not" is enclosed in a <span> tag with a style attribute that sets the color to red. When the HTML code is rendered in a web browser, the phrase "do not" will be displayed in red font.
Overall, the <span> tag is a useful HTML text formatting tag for grouping inline elements and applying styles or formatting to them, making it easier to style specific words or phrases within a paragraph, apply a background color to a block of text, or group multiple inline elements together.
HTML Colours Last updated:
March 10, 2023, 2:26 p.m.
HTML colors refer to the different ways in which colors can be specified and used in web development. There are various methods of defining colors in HTML, such as using hexadecimal color codes, RGB color values, and named colors.
Colors play a crucial role in web design, and it is important to use them effectively to enhance the look and feel of a website. In addition to defining colors, HTML also provides various CSS properties for styling the background, text, borders, and links on a webpage.
Choosing the right color scheme for a website can also impact its usability and accessibility, especially for users with color vision deficiencies. It is important to consider accessibility guidelines when selecting colors for a website and ensure that there is sufficient contrast between foreground and background colors.
Overall, understanding HTML colors and their properties is essential for web developers to create visually appealing and accessible websites.
HTML color codes
Hexadecimal color codes
HTML hexadecimal color codes are a way to specify colors using a combination of six digits, where each digit represents the intensity of one of the three primary colors: red, green, and blue (RGB). The digits are written in hexadecimal notation, which means that they can range from 0 to 9 and from A to F.
For example, the color code #FF0000 represents pure red. The first two digits (FF) represent the intensity of red, which is at its maximum level. The other two colors, green and blue, are set to zero, meaning they are not present in the color.
Similarly, the color code #00FF00 represents pure green, while #0000FF represents pure blue.
Other colors can be created by mixing different levels of red, green, and blue. For instance, the color code #FFA500 represents a shade of orange, which is a mix of red and green with higher intensity of red (#FF) and lower intensity of green (#A5).
Hexadecimal color codes are widely used in HTML and CSS to specify colors for text, background, borders, and other visual elements on a webpage. By using hexadecimal color codes, designers can create a vast array of colors to suit their needs.
RGB color values
HTML RGB color values are another way to specify colors using a combination of three values that represent the intensity of the primary colors red, green, and blue. RGB values range from 0 to 255, where 0 represents no intensity of the color and 255 represents maximum intensity.
For example, the color code rgb(255, 0, 0) represents pure red. The first value (255) represents the intensity of red, which is at its maximum level. The other two colors, green and blue, are set to zero, meaning they are not present in the color.
Similarly, the color code rgb(0, 255, 0) represents pure green, while rgb(0, 0, 255) represents pure blue.
Other colors can be created by mixing different levels of red, green, and blue. For instance, the color code rgb(255, 165, 0) represents a shade of orange, which is a mix of red and green with higher intensity of red (255) and lower intensity of green (165).
RGB color values are widely used in HTML and CSS to specify colors for text, background, borders, and other visual elements on a webpage. By using RGB color values, designers can create a vast array of colors to suit their needs.
Named colors
HTML named colors are predefined color names that can be used to specify colors in HTML and CSS. The named colors include common colors like red, green, blue, yellow, black, and white, as well as more specific colors like navy, olive, and teal.
For example, the color code "red" represents the color red. Other examples of named colors include "green", "blue", "yellow", "black", "white", "navy", "olive", and "teal".
Named colors can be used in HTML and CSS in place of hexadecimal or RGB color codes. For instance, the following HTML code sets the background color of a webpage to white using the named color "white":
<body style="background-color: white;">
Named colors are a useful and convenient way to specify colors, especially for designers who are not familiar with hexadecimal or RGB color codes. However, named colors offer a limited set of color options compared to hexadecimal or RGB color codes, and they may not always match the exact color desired.
Transparent colors
In HTML, transparent colors can be achieved by using the RGBA or HSLA color model. These models include an alpha value, which specifies the opacity of the color. An alpha value of 1 is completely opaque, while an alpha value of 0 is completely transparent.
Here are some examples of how to use transparent colors in HTML:
1. Using RGBA:
<p style="background-color: rgba(255, 0, 0, 0.5);">
  This paragraph has a semi-transparent red background.
</p>
In this example, the background color is set to a semi-transparent red using the RGBA color model. The first three values (255, 0, 0) represent the red, green, and blue components of the color, and the fourth value (0.5) represents the alpha value.
2. Using HSLA:
<p style="color: hsla(120, 100%, 50%, 0.3);">
  This paragraph has a semi-transparent green text color.
</p>
In this example, the text color is set to a semi-transparent green using the HSLA color model. The first value (120) represents the hue, the second value (100%) represents the saturation, the third value (50%) represents the lightness, and the fourth value (0.3) represents the alpha value.
By using transparent colors, you can create effects like overlapping colors, fading effects, and other visual effects that require an element to be partially visible.
Using CSS colors
HTML and CSS provide a wide range of color properties that can be used to change the color of different elements on a webpage. Here are some of the most commonly used color properties in CSS:
color property:
The color property is used to set the text color of an element. It can take different values such as a named color, a hexadecimal color code, or an RGB color value.
<p style="color: red;">This text is in red.</p>
background-color property:
The background-color property is used to set the background color of an element. It can take the same values as the color property.
<p style="background-color: #f0f8ff;">This paragraph has a light blue background.</p>
border-color property:
The border-color property is used to set the color of an element's border. It can take the same values as the color property.
<p style="border: 1px solid black; border-color: red;">This paragraph has a red border.</p>
opacity property:
The opacity property is used to change the transparency of an element. It takes a value between 0 and 1, with 0 being completely transparent and 1 being completely opaque.
<p style="background-color: red; opacity: 0.5;">This paragraph has a semi-transparent red background.</p>
text-shadow property:
The text-shadow property is used to add a shadow to text. It takes a comma-separated list of values representing the horizontal offset, vertical offset, blur radius, and color of the shadow.
<p style="text-shadow: 2px 2px 4px grey;">This text has a shadow.</p>
These are just a few examples of the many color properties available in CSS. By using these properties, you can customize the colors and appearance of your webpage to make it more visually appealing.
Using Gradients
Gradients in HTML are used to create a smooth transition between two or more colors. There are two types of gradients: linear and radial. Here's how to use gradients in HTML:
1. Linear Gradient:
To create a linear gradient, you need to specify the start and end points of the gradient and the colors you want to use. Here's an example:
<div style="background: linear-gradient(to right, red, orange, yellow);">
  <h1>Hello, World!</h1>
  <p>This div has a linear gradient background.</p>
</div>
In this example, the background property is set to linear-gradient, which specifies that we want to create a linear gradient. The to right keyword specifies that we want the gradient to go from left to right. The next three values are the colors that we want to use in the gradient - red, orange, and yellow.
2. Radial Gradient:
To create a radial gradient, you need to specify the center point, the shape and size of the gradient, and the colors you want to use. Here's an example:
<div style="background: radial-gradient(circle, #FFA07A, #FF8C00, #FF6347);">
  <h1>Hello, World!</h1>
  <p>This div has a radial gradient background.</p>
</div>
In this example, the background property is set to radial-gradient, which specifies that we want to create a radial gradient. The circle keyword specifies that we want the gradient to be circular. The next three values are the colors that we want to use in the gradient - #FFA07A, #FF8C00, and #FF6347.
You can also use gradients in combination with other CSS properties to create more complex effects. By using gradients in your HTML and CSS, you can create visually stunning web pages that stand out from the rest.
Choosing the right color scheme for your website
Choosing the right color scheme for your website is important because it can affect the overall look and feel of your site. Here are some tips for choosing the right color scheme:
Start with your brand colors: If you have a brand logo or colors associated with your business, use those as a starting point. This will help to create a cohesive look across all of your marketing materials.
Consider your audience: Think about who your target audience is and what colors might appeal to them. For example, if your audience is predominantly women, you might want to use colors that are traditionally associated with femininity, such as pink and lavender.
Use color theory: Color theory is the study of how colors can affect emotions and behavior. For example, warm colors like red and orange can create a sense of excitement and urgency, while cool colors like blue and green can create a calming effect. Choose colors that match the mood you want to convey.
Use contrast: Make sure there is enough contrast between the background color and the text color to ensure readability. Avoid using colors that are too similar to each other, as this can make the text difficult to read.
Use color tools: There are many online tools that can help you choose the right color scheme for your website. One popular tool is Adobe Color, which allows you to create and save color palettes.
Here's an example of a color scheme for a website that sells organic food:
Primary color: #88B04B (a shade of green that represents health and nature)
Secondary color: #F4E9CD (a light beige that represents freshness and purity)
Accent color: #F15B31 (a bright red that represents energy and passion)
By using a color scheme that represents health, nature, freshness, purity, energy, and passion, this website can create a cohesive and appealing look that is appropriate for its audience.
Accessibility considerations
Accessibility considerations for color use in HTML are important to ensure that users with visual impairments or color blindness can still access and use your website. Here are some tips for making your website more accessible in terms of color use:
Use sufficient contrast: Use a color contrast checker to make sure that the contrast between your text and background colors is sufficient. This ensures that text is legible for users with visual impairments. The Web Content Accessibility Guidelines (WCAG) recommends a minimum contrast ratio of 4.5:1 for regular text and 3:1 for large text.
Avoid relying on color alone: Use additional visual cues, such as underlining or bolding, to emphasize important information. This helps users who are color blind to still understand the meaning of the content.
Use color-blind friendly color palettes: Avoid using color palettes that are difficult for color-blind users to differentiate between. Use color-blind friendly color palettes or use online tools to simulate how your website looks for people with different types of color blindness.
Use descriptive text: Provide descriptive text for images and other visual elements. This helps users with visual impairments to understand the content and context of the images.
Here's an example of an accessible color palette for a website:
Primary color: #00539C (a dark blue)
Secondary color: #8ED6FF (a light blue)
Accent color: #FFBB00 (a bright yellow)
This color palette has a high contrast ratio between the text and background colors and does not rely solely on color to convey important information. Additionally, the colors used are distinguishable for users with different types of color blindness. By considering accessibility when choosing your color scheme, you can create a website that is usable and accessible for all users.
HTML Styles - CSS Last updated:
June 23, 2024, 1:47 a.m.
CSS stands for Cascading Style Sheets. It's a powerful language that dictates the visual presentation of your web pages. Just like a well-tailored outfit elevates your appearance, CSS allows you to define styles (colors, fonts, layouts) for your HTML elements, transforming a basic structure into a visually engaging website.
Using CSS:
There are three primary ways to incorporate CSS into your web development workflow:
Inline Styles: Directly embed styles within HTML elements using the style attribute. This approach is suitable for minor adjustments but can lead to cluttered code for complex layouts.
<h1 style="color: blue; font-size: 2em;">This is a heading</h1>
Internal Stylesheets: Define styles within a <style> tag placed in the <head> section of your HTML document. This approach offers better separation of concerns and maintainability.
External Stylesheets: Create separate CSS files (.css extension) containing your styles. Link them to your HTML document using the <link> tag in the <head> section. This promotes code reusability and cleaner HTML structure.
By effectively utilizing CSS, you gain control over the look and feel of your web pages. Remember, well-structured and maintainable CSS is crucial for creating a seamless user experience.
Inline CSS
Inline CSS offers a way to style HTML elements directly within the opening tag, using the style attribute. While convenient for quick modifications, it's generally recommended for specific use cases due to potential drawbacks.
Applying Styles with Inline CSS:
Inline styles are defined within the style attribute of an HTML element.
The attribute value is a semicolon-separated list of CSS property-value pairs enclosed in double quotes.
<h1 style="color: blue; font-size: 1.5em;">This is a heading</h1>
In this example, the <h1> element is styled with a blue color and a larger font size (1.5em).
Advantages and Considerations:
Inline CSS is useful for minor adjustments or testing purposes as it doesn't require creating separate CSS files.
However, overuse of inline styles can lead to cluttered and less maintainable code, especially for complex web pages with numerous styled elements.
Best Practices and Alternatives:
For consistent styling across multiple elements or larger projects, external stylesheets are the preferred approach.
Consider using CSS frameworks or preprocessors for improved organization and efficiency in your styles.
Inline CSS can be a handy tool for quick styling, but prioritize external stylesheets for better maintainability and readability in most scenarios.
Internal CSS
Internal CSS offers a convenient way to define styles specifically for a single HTML document. This approach keeps your styles organized and avoids the need for separate CSS files.
How it Works:
Placement: Internal CSS is defined within the <style> element placed inside the <head> section of your HTML document.
Selectors and Styles: Within the <style> tags, you use standard CSS syntax to define selectors (targeting specific HTML elements, classes, or IDs) and their corresponding styles (properties and values).
Example:
<!DOCTYPE html>
<html lang="en">
<head>
    <meta charset="UTF-8">
    <meta name="viewport" content="width=device-width, initial-scale=1.0">
    <title>Internal CSS Example</title>
    <style>
        body {  /* Selects the entire body element */
            font-family: Arial, sans-serif;
            margin: 0;
        }
        h1 {   /* Selects all <h1> elements */
            color: blue;
            font-size: 2em;
        }
        #main-content {  /* Selects the element with ID "main-content" */
            background-color: #f0f0f0;
            padding: 20px;
        }
    </style>
</head>
<body>
    <h1>This is a heading</h1>
    <div id="main-content">
        <p>This is some content with a light gray background.</p>
    </div>
</body>
</html>
Advantages:
Simple and Quick: Ideal for small projects or quick styling adjustments.
Inline Styling Alternative: Provides more organization and maintainability compared to inline styles.
Disadvantages:
Limited Scope: Styles confined to a single document.
Scalability Issues: Large projects with many internal stylesheets can become cumbersome to manage.
Choosing Internal vs. External CSS:
For small, single-page projects, internal CSS can be a suitable choice. However, for larger projects with multiple HTML documents, external CSS files offer better organization, reusability, and easier maintenance.
External CSS
External Cascading Style Sheets (CSS) offer a powerful approach to styling your web pages. This method promotes separation of concerns, keeping your HTML code clean and focused on structure, while CSS handles the visual presentation.
Benefits of External CSS:
Maintainability: Changes to styles in a single CSS file cascade to all linked HTML pages, ensuring consistency and reducing redundancy.
Reusability: Styles defined in an external CSS file can be reused across multiple web pages, saving time and effort.
Readability: Separating styles from HTML improves code readability and organization.
Linking to External CSS:
To link an external CSS file to your HTML document, use the `` tag within the <head> section:
In this example, the <link> tag with the rel="stylesheet" attribute specifies that the linked file (styles.css) contains CSS styles. The href="styles.css" attribute points to the location of the external CSS file relative to the HTML document.
By adopting external CSS, you can create well-structured HTML documents with organized and maintainable styles, leading to a more efficient and scalable web development workflow.
CSS Colors And All
CSS (Cascading Style Sheets) is the language that controls the visual presentation of your web pages. It allows you to define styles for elements like fonts, colors, borders, and margins, creating a cohesive and visually appealing user interface.
CSS Colors and All Colors:
CSS offers a vast array of ways to define colors for your elements. You can use:
Basic color keywords:red, green, blue, etc.
Hexadecimal codes:#FF0000 (red), #00FF00 (green), etc.
RGB values:rgb(255, 0, 0) (red), rgb(0, 255, 0) (green), etc.
HSL values:hsl(0, 100%, 50%) (red), hsl(120, 100%, 50%) (green), etc.
Example:
h1 { color: #333; }  /* Black using a hex code */
p { color: rgb(0, 128, 0); }  /* Green using RGB values */
Fonts and Sizes:
CSS allows you to control the font family, size, and weight of text elements.
Font family: Specify the desired font, like Arial, Helvetica, or a custom font loaded from a file.
Font size: Define the text size in pixels (px), ems (relative to parent element's font size), or other units.
Font weight: Set the boldness of the text using keywords like normal, bold, or numerical values (400 for normal, 700 for bold).
Margins specify the space around an element, separating it from its neighbors. You can set margins for all sides (top, right, bottom, left) individually or together.
Example:
p { margin: 10px; }  /* 10px margin on all sides */
img { margin-left: 20px; margin-bottom: 15px; }  /* Custom margins for left and bottom */
By mastering these fundamental CSS concepts, you can create visually appealing and well-structured web pages, enhancing the user experience. Remember, experimentation and exploration are key to unlocking the full potential of CSS!
HTML Links Last updated:
June 23, 2024, 1:49 a.m.
Hyperlinks, or simply "links," are essential elements for web navigation. They allow users to seamlessly jump between pages or sections within your website. This documentation explores how HTML and CSS work together to create and style these links.
The Foundation: HTML Links with <a> Tag:
The <a> tag is the backbone of creating links in HTML. It defines an anchor element, and its href attribute specifies the destination URL. The text content between the opening and closing <a> tags becomes the visible clickable portion of the link.
While HTML defines the link functionality, CSS empowers you to control their visual appearance. You can target the <a> tag and its various states (unvisited, visited, hovered over) using CSS selectors. Common properties include:
color: Define the link color (default is blue).
text-decoration: Control underline styles (default is underline, can be removed).
font-weight: Set the boldness of the link text.
Example:
a {
  color: #333;  /* Set link color to dark gray */
  text-decoration: none;  /* Remove underline */
}

a:hover {
  color: #000;  /* Change color on hover to black */
}
By combining HTML and CSS effectively, you can create well-structured and visually appealing links that enhance the user experience of your web pages. Remember, clear and styled links are crucial for guiding users through your website.
HTML Links - Hyperlinks
In the realm of web pages, HTML links, also known as hyperlinks, serve as the cornerstones of navigation. They allow users to seamlessly jump between web pages or sections within the same page, fostering a dynamic and interconnected experience. This documentation delves into the creation and functionalities of HTML links.
HTML Links - Syntax:
The basic structure of an HTML link involves the <a> (anchor) tag:
<a href="url">Link Text</a>
Replace url with the destination URL (web address) of the linked resource (another web page, an image, etc.).
Link Text is the visible text displayed to the user, typically describing the content of the linked resource.
The target attribute specifies where the linked content should open:
_blank: Opens the linked content in a new browser tab or window.
_self: Opens the linked content in the current window (default behavior).
_parent: Opens the linked content in the parent frame (if applicable).
_top: Opens the linked content in the full body of the window, replacing the current frame content.
Example:
<a href="https://www.example.com" target="_blank">Open in New Tab</a>
Absolute URLs vs. Relative URLs:
Absolute URLs: Provide the complete web address, including protocol (http://, https://), domain name, and path to the resource.
Relative URLs: Specify the path relative to the current document's location. This is generally preferred for better maintainability, especially when dealing with linked resources within the same website.
By incorporating these techniques, you can create a user-friendly and well-connected web experience using HTML links. Remember, effective navigation is crucial for keeping your users engaged and exploring your website's content.
HTML Link Colors
Hyperlinks (or anchor tags <a>) are essential elements in web pages, allowing users to navigate between web pages or sections within the same page. While functionality is key, you can also customize their visual appearance using CSS. This documentation explores HTML link colors and styling considerations.
HTML Link Colors (Info and Example):
By default, unvisited links typically appear blue, visited links appear purple, and active links (during click) appear red. However, you can leverage CSS to modify these colors and create a more visually consistent or branded experience.
While <a> elements are primarily for links, you can style them to resemble buttons using CSS. This enhances the user experience by providing visual cues for clickable elements.
You can also leverage links to create bookmarks within a webpage. By assigning a unique ID to a specific section and linking to it using the href attribute with a # followed by the ID, users can navigate directly to that section.
Example:
<h2 id="introduction">Introduction</h2>
<p>...</p>

<a href="#introduction">Jump to Introduction</a>
Remember, effective use of link colors and styling can improve the visual appeal and usability of your web pages. Experiment with different techniques to create a user-friendly and engaging browsing experience.
HTML Images Last updated:
June 23, 2024, 1:56 a.m.
Images enhance the visual appeal and user experience of your web pages. HTML provides functionalities to seamlessly integrate images into your document structure. This documentation explores essential aspects of HTML images.
HTML Image Syntax:
The <img> element is used to embed images into your HTML code. It's an empty element, meaning it doesn't have closing tags. Here's the basic syntax:
<img src="image.jpg" alt="Image description">
Essential Attributes:
src: This mandatory attribute specifies the path or URL of the image file.
alt: The alt attribute provides alternative text for the image, crucial for accessibility and SEO (Search Engine Optimization). It's displayed if the image cannot be loaded or for screen readers used by visually impaired individuals.
Image Size - Width and Height:
You can control the dimensions of the displayed image using the width and height attributes. These values are specified in pixels (px).
Width and Height, or Style?: While these attributes define displayed size, consider using CSS for more responsive layouts where image dimensions might adapt to different screen sizes.
Using Images in Different Locations:
Images in Another Folder: If the image is in a different folder within your project, specify the relative path (e.g., ../images/image.jpg).
Images on Another Server/Website: Provide the full URL of the image hosted elsewhere (e.g., https://example.com/images/image.jpg).
Additional Considerations:
Animated Images: While not directly supported by HTML, animated images (like GIFs) can be embedded using the <img> tag.
Image as a Link: To create a clickable image that links to another page, wrap the <img> tag within an <a> (anchor) tag with the href attribute specifying the target URL.
Image Floating:You can use the float CSS property to position images alongside text content (e.g., float: left;).
Common Image Formats:
Here's a table summarizing common image formats:
Abbreviation
File Format
File Extension
JPG/JPEG
Joint Photographic Experts Group
.jpg, .jpeg
PNG
Portable Network Graphic
.png
GIF
Graphics Interchange Format
.gif
SVG
Scalable Vector Graphics
.svg
WebP
Web Picture
.webp
Remember, choosing the appropriate image format and size is crucial for optimal website performance and user experience.
HTML Image Maps
Image maps are a technique in HTML that allows you to create clickable areas on an image. Clicking on these designated areas triggers specific actions, like navigating to a new web page or displaying additional information. This documentation delves into the concept and demonstrates how to create image maps.
Image Maps:
An image map is an invisible layer on top of an image that defines clickable regions. When a user clicks on the image, the coordinates of the click are compared to the defined areas within the map. If a match is found, the corresponding action (usually a link) is triggered.
How Does it Work?
Image Element: You start with an <img> element to display the image.
Use Map: Within the <img> element, you reference an image map using the `usemap` attribute. The value of this attribute points to the ID of the map element.
Define the Map: Create a separate <map> element with a unique ID.
Clickable Areas: Inside the <map> element, define clickable areas using the <area> element.
Create Image Map:
Here's an example demonstrating how to create an image map with a clickable rectangle:
The <shape> attribute specifies the geometric shape of the area (e.g., rect, circle, poly).
The coords attribute defines the coordinates of the shape (for rectangles: x1,y1,x2,y2).
The href attribute specifies the link associated with the area (where the user navigates when clicking).
The alt attribute provides alternative text for accessibility and screen readers.
Shape="rect":
In this example, shape="rect" defines a rectangular area. The coords attribute specifies the top-left corner coordinates (x1,y1) and the bottom-right corner coordinates (x2,y2) of the rectangle. Clicking within this rectangular area on the image will navigate the user to the "about-us.html" page.
By incorporating image maps, you can enrich your web pages with interactive elements, enhancing user engagement and navigation. You can define various shapes (circles, polygons) to create more complex clickable regions on your images.
HTML Background Images
Background images add visual flair and enhance the overall presentation of your web pages. HTML provides various ways to incorporate background images, allowing you to create captivating website layouts.
HTML Background Images:
Use the background-image property within the CSS body selector or a specific element's style attribute to define a background image.
Provide the path to the image file as the value for background-image.
<style>
      body {
          background-image: url("background.jpg");
      }
  </style>
Background Image on a Page:
The background image is displayed behind the content on the page. It stretches to fill the entire viewport by default.
Background Repeat:
The background-repeat property controls how the background image is repeated within the element's area. Here are some common options:
repeat: Repeats the image both horizontally and vertically (default).
no-repeat: Displays the image only once (useful for large images).
The background-cover property scales the background image to fill the entire container element while preserving its aspect ratio. This ensures the image doesn't appear stretched or distorted.
.banner {
      background-image: url("hero.jpg");
      background-cover: cover;
      height: 300px;  /* Set a height for the element */
  }
Background Stretch:
The background-stretch property (not supported in all browsers) stretches the background image to fill the container element, potentially distorting the aspect ratio.
Choosing the Right Approach:
Use no-repeat for large background images you want to display once.
Utilize repeat or repeat-x/y for smaller patterns or textures.
Employ background-cover for hero images or sections where you want the image to fill the space while maintaining its proportions.
Use background-stretch with caution, as it can distort the image.
By effectively incorporating background images and their properties, you can elevate the visual appeal and create a captivating user experience on your web pages.
HTML picture Element
The HTML <picture> element empowers you to deliver optimal image experiences across various devices and screen sizes. It provides a flexible mechanism to specify multiple image sources, allowing the browser to choose the most suitable image based on factors like viewport size and pixel density.
The HTML<picture>Element:
The <picture> element acts as a container for different image sources (<source>) and a fallback image (<img>). Browsers evaluate the <source> elements and select the one that best matches the device's capabilities. If none of the sources are suitable, the browser defaults to the image specified in the <img> element.
When to Use the Picture Element:
Consider using the <picture> element when:
You want to deliver high-resolution images for high-density displays (e.g., Retina screens).
You need to optimize image loading times by providing alternative smaller images for devices with limited bandwidth.
You require flexibility in specifying image formats like WebP or AVIF, which may not be universally supported yet.
Standard image tag, requires an src attribute to specify the image source.
<source>
Defines an alternative image source within a <picture> element.
srcset
Attribute within <source> that specifies the image URL and its corresponding widths.
media
Attribute within <source> that defines a media query for applying the source.
type
Attribute within <source> that specifies the image format (e.g., image/jpeg).
alt
Attribute within <img> that provides alternative text for accessibility.
By incorporating the <picture> element into your web development workflow, you ensure optimal image delivery, leading to faster loading times and a superior user experience across diverse devices.
HTML Favicon
A favicon, short for "favorites icon," is a small image that serves as a visual representation of your website. It appears in various locations, including the browser tab, bookmark bar, and browser history. This documentation guides you through adding a favicon to your HTML project.
How To Add a Favicon in HTML:
Prepare Your Favicon: Create a small image (usually 16x16 pixels or 32x32 pixels) in a supported format (see below).
Place the Favicon File: Position the favicon image file in your web project directory. For optimal accessibility, it's recommended to place it in the root directory of your website.
Replace "favicon.ico" with the actual filename of your favicon image.
The rel="icon" attribute specifies the relationship between the document and the linked resource (the favicon).
The href attribute points to the location of the favicon image file.
The type="image/x-icon" attribute explicitly defines the favicon image format (though modern browsers can usually handle this automatically).
Favicon File Format Support:
While the .ico format (Windows Icon) has traditionally been used for favicons, modern browsers also support other image formats:
.png (Portable Network Graphic)
.gif (Graphics Interchange Format)
Additional Considerations:
You can include multiple favicon sizes using link elements with different sizes specified in the sizes attribute. This ensures your favicon looks good on various devices with high-resolution displays.
Consider using online tools or favicon generators to create favicons in different sizes and formats.
By incorporating a favicon, you enhance your website's branding and user experience. It provides a small but impactful visual cue that strengthens your website's identity in the digital landscape.
HTML Tables Last updated:
June 23, 2024, 1:22 a.m.
HTML tables provide a structured way to present tabular data within your web pages. They are ideal for displaying information in a clear and organized format, making it easy for users to scan and understand.
Defining an HTML Table:
The <table> element forms the foundation of your table. It can contain rows (<tr>) and cells (<td> or <th>).
Table Rows (<tr>): Each row represents a horizontal line of data within the table.
Table Cells (<td> and <th>):
Table cells (<td>) are used for regular data content within the table.
Table headers (<th>) are used for the header row, identifying the meaning of each data column. They are typically bold and centered by default.
Creating a Basic Table:
Here's a simple example of an HTML table structure:
You can enhance the appearance of your tables using CSS to control aspects like borders, background colors, and font styles. Explore CSS properties like border, padding, and font-weight to customize your tables for optimal readability and presentation.
Mastering HTML tables empowers you to present data effectively on your web pages. By understanding the core elements (<table>, <tr>, <td>, <th>), you can create clear and informative tables that improve the user experience of your website. Remember, well-structured tables can make complex data sets more easily digestible for your visitors.
HTML Table Borders
Tables provide a structured way to present data in web pages. While a basic table can be functional, adding borders enhances its visual appeal and readability. This guide explores various techniques for incorporating borders into your HTML tables.
How To Add a Border:
There are two primary ways to add borders to an HTML table:
The border attribute:
This attribute directly defines the border width and style for the entire table.
By default, table borders create double borders where cells meet. Setting border-collapse: collapse in CSS merges these borders into a single line, resulting in a cleaner look.
Style Table Borders:
CSS allows you to style table borders using various properties:
border-width: Controls the thickness of the border (e.g., 1px, 2px, thin, medium, thick).
border-style: Defines the style (e.g., solid, dashed, dotted).
border-color: Sets the color of the border (color keywords or hex codes).
Example:
table {
    border-collapse: collapse;
    border: 1px solid #ddd;  /* 1px solid gray border for the entire table */
}
th, td {
    border: 1px solid #ccc;  /* 1px solid light gray border for each cell */
}
Round Table Borders (border-radius):
While not directly supported by the border attribute, you can use CSS border-radius to create rounded table corners.
Dotted Table Borders:
Set the border-style property to dotted to create a dotted border style.
Border Color:
Specify the border color using color keywords or hex codes within the border-color property.
By incorporating these techniques, you can create visually distinct and informative tables that complement your web page design. Remember, well-styled tables enhance the user experience by making data easier to scan and understand.
HTML Table Sizes
Tables in HTML provide a structured way to present data. However, by default, they can stretch to fill the available space. This documentation explains how to control the size of your HTML tables, columns, and rows, ensuring a clean and organized layout.
HTML Table Width:
There are two main approaches to define the width of an entire table:
In this example, we set the total column widths to 100% to avoid any horizontal overflow, and then define individual column widths within the <th> elements.
HTML Table Row Height:
While there's no direct attribute for row height in HTML, you can achieve this using CSS:
Here, we define the row height using the style attribute within the <tr> tag.
Choosing the Right Approach:
Inline styles offer quick adjustments but can make code cluttered.
The width attribute for tables provides a more semantic approach.
Consider using CSS for more complex and reusable styles.
By effectively controlling table dimensions, you can create well-formatted and visually appealing tables that enhance the readability and usability of your web pages.
HTML Table Headers
Tables are a versatile way to present data in a structured format within your HTML documents. Table headers enhance readability and user comprehension by labeling the content within each column. This documentation explores how to create and utilize table headers effectively.
HTML Table Headers:
The <th> element defines a cell as a header for a group of cells. It's typically placed within the first <tr> (table row) element.
By incorporating these techniques, you can create clear, informative, and well-structured tables in your HTML documents. Remember, effective presentation of data is essential for conveying information effectively to your users.
HTML Table Padding & Spacing
Tables provide a structured way to present data within your web pages. HTML offers mechanisms to control the spacing between the table content (text or elements) and its borders, as well as the spacing between adjacent cells. This guide explores these functionalities: Cell Padding and Cell Spacing.
HTML Table - Cell Padding:
Cell padding refers to the space between the cell border and its content. You can control cell padding using the cellpadding attribute within the <table> tag.
The value of cellpadding is specified in pixels (px).
A higher value increases the space between the content and the border.
Cell spacing refers to the space between the borders of adjacent cells. You can control cell spacing using the cellspacing attribute within the <table> tag.
Similar to cellpadding, the value of cellspacing is specified in pixels (px).
A higher value increases the space between cell borders.
Use cellpadding to control the space between content and borders within a cell.
Use cellspacing to control the space between the borders of adjacent cells.
Additional Considerations:
You can set cellpadding and cellspacing to zero for a more compact table layout.
Inline styles or external stylesheets can be used to define table styles (background color, border styles, etc.).
By effectively utilizing cell padding and spacing, you can enhance the readability and visual appeal of your HTML tables, providing a better user experience.
HTML Table Colspan & Rowspan
Tables provide a structured way to present data in web pages. HTML offers two attributes, colspan and rowspan, to enhance table flexibility by merging cells across rows and columns.
HTML Table - Colspan:
The colspan attribute specifies the number of columns a table cell should span horizontally. This allows you to create wider cells that encompass multiple columns.
The rowspan attribute defines the number of rows a table cell should span vertically. This enables you to create cells that stretch across multiple rows.
Example:
<table>
  <tr>
    <th>Product</th>
    <th>Description</th>
  </tr>
  <tr>
    <td>Laptop</td>
    <td rowspan="2">High-performance laptop for demanding tasks.</td>  </tr>
  <tr>
    <td>Tablet</td>
    <td>Compact and portable device for everyday use.</td>
  </tr>
</table>
Key Points:
Values for colspan and rowspan must be positive integers.
These attributes are typically used with table header cells (<th>) to create labels spanning multiple rows or columns.
Overlapping cells are not allowed, so using both colspan and rowspan on the same cell might lead to unexpected results.
By effectively utilizing colspan and rowspan, you can create more efficient and visually appealing table layouts for your web pages.
HTML Table Styling
Tables are a cornerstone of web development for presenting data in a structured format. However, plain tables can appear monotonous. This guide explores various HTML and CSS techniques to style your tables, improving user experience and readability.
HTML Table - Zebra Stripes:
Achieve a zebra-striped effect by alternating background colors for odd and even rows.
Utilize the CSS :nth-child(odd) and :nth-child(even) pseudo-selectors to target specific rows.
Combine the previous methods for a more pronounced zebra effect.
Horizontal Dividers:
Add horizontal dividing lines between table rows using CSS border-bottom property on table rows.
table tr {
  border-bottom: 1px solid #ccc;
}
Hoverable Table:
Enhance user interaction by changing background color on hover using the CSS :hover pseudo-class.
table tr:hover {
  background-color: #ddd;
}
These are just a few examples. Remember, CSS offers a vast array of styling options. Experiment with colors, borders, and padding to create visually appealing and informative tables that cater to your specific needs.
HTML Table Colgroup
The HTML colgroup element offers a powerful mechanism for defining groups of columns within an HTML table. It allows you to apply styles or formatting to multiple columns simultaneously, improving code organization and maintainability.
HTML Table Colgroup:
The colgroup element is placed within the <table> tag, after any <caption> element but before <thead>, <tboady>, <tfoot>, or <tr> elements. It typically contains one or more col elements, each defining styles for a specific column group.
Legal CSS Properties:
While most CSS properties cannot be applied directly to colgroup, you can control the following visual aspects of columns:
background (all background properties like background-color, background-image, etc.)
border (all border properties like border-style, border-width, border-color)
width (specifies the column width)
Multiple Col Elements:
You can use multiple col elements within a colgroup to define styles for different column groups within the table. The order of col elements corresponds to the order of columns in the table.
While you can have an empty colgroup element without any col children, it generally doesn't provide any styling benefits.
Hide Columns:
You can achieve a hidden column effect by setting the width property to 0 within the col element. However, this doesn't truly hide the column from screen readers or accessibility tools. Consider alternative approaches for hiding content if necessary.
The colgroup element provides a valuable tool for managing column styles within HTML tables. By grouping columns and applying styles collectively, you can enhance code readability and maintainability for complex tables. Remember, using `colgroup` effectively can lead to a more organized and visually appealing table structure.
HTML Lists Last updated:
June 24, 2024, 2:05 p.m.
HTML provides various list elements to organize and present information in a clear and concise manner. This documentation explores three common list types: unordered lists, ordered lists, and description lists.
Unordered HTML List (<ul>):
Used for items with no specific order.
Each list item is denoted by the <li> (list item) element.
Ideal for presenting shopping lists, features, or steps in a non-sequential process.
By default, list items are numbered sequentially, but you can customize numbering styles with CSS.
Suitable for displaying numbered steps in a recipe, instructions, or historical timelines.
<ol>
<li>Preheat oven to 350°F (175°C).</li>
<li>Mix ingredients in a bowl.</li>
<li>Bake for 20 minutes.</li>
</ol>
HTML Description Lists (<dl>):
Used for presenting terms (definitions) with associated descriptions.
The <dl> element contains both <dt> (definition term) and <dd> (definition description) elements.
Ideal for glossaries, technical specifications, or any scenario where you need to define terms.
<dl>
<dt>HTML</dt>
<dd>HyperText Markup Language, the building block for web pages.</dd>
<dt>CSS</dt>
<dd>Cascading Style Sheets, defines the visual presentation of web pages.</dd>
</dl>
By effectively utilizing these list elements, you can enhance the readability and organization of your web content, making it easier for users to understand and navigate. Remember, choosing the appropriate list type depends on the nature of the information you're presenting.
HTML Unordered Lists
Unordered lists, also known as bulleted lists, are a versatile way to present items in a non-sequential manner on your web page. HTML provides a simple yet powerful mechanism for creating and styling these lists.
Unordered HTML List:
The <ul> (unordered list) element serves as the foundation for creating unordered lists. Each list item within the list is defined using the <li> (list item) element.
This code snippet will render a bulleted list with three items: "Item 1", "Item 2", and "Item 3".
Unordered HTML List - Choose List Item Marker:
While the default marker for unordered lists is a bullet (often a circle), you can customize the marker appearance using the style attribute on the <ul> element. However, this approach has limited browser compatibility.
Here's a table outlining alternative methods (using CSS) for defining list item markers:
Value
Description
list-style-type: disc;
Round bullet (default)
list-style-type: circle;
Circle bullet
list-style-type: square;
Square bullet
list-style-type: none;
No marker (removes default bullet)
list-style-type: image;
Custom image as a marker (requires additional CSS properties)
Example (CSS):
ul.custom-list {
  list-style-type: square;
}
<ul class="custom-list">
  <li>Item with a square marker</li>
  <li>Another square item</li>
</ul>
This example defines a class named custom-list with list-style-type: square;, resulting in a list with square markers instead of the default bullets.
Nested HTML Lists:
You can create nested unordered lists by placing <ul> elements within <li> elements. This allows for hierarchical grouping of list items.
While unordered lists are typically displayed vertically, you can achieve a horizontal layout using CSS properties like `display: inline-block` and margin.
By understanding and applying these concepts, you can create well-structured and visually appealing unordered lists in your HTML documents. Remember, CSS offers further customization options for styling list appearance to match your website's design.
HTML Ordered Lists
HTML provides ordered lists (<ol>) to present information in a numbered sequence. This documentation explains how to create and customize ordered lists to enhance the organization and readability of your web pages.
Ordered HTML List:
Use the <ol> and <ol> tags to define an ordered list. Each list item is created using the <li> tag within the <ol>. The browser automatically numbers the list items sequentially.
This code demonstrates a nested list structure, with subtasks nested within the second main task.
By effectively using ordered lists, you can present sequential steps, procedures, or any content that benefits from a numbered structure, improving the clarity and organization of your web pages.
HTML Block and Inline Last updated:
June 23, 2024, 1:05 a.m.
HTML elements come in two main categories based on how they occupy space within your web page: block-level elements and inline elements. Mastering this distinction is crucial for creating well-structured and visually appealing web pages.
Block-Level Elements:
These elements start on a new line and typically occupy the full available horizontal space by default.
Examples include headings (<h1>, <h2>), paragraphs (<p>), and most form elements (<input>, <button>).
When multiple block-level elements appear consecutively, each one begins on a new line, creating a vertical stacking effect.
Inline Elements:
These elements occupy only the space required for their content and do not force a new line before or after them.
Examples include spans (<span>), anchors (<a> for links), and strong (<strong>) or emphasis (<em>) elements for text formatting.
Inline elements can sit side-by-side within a line of text, allowing you to format specific portions of content within a block-level element.
By understanding these concepts, you can effectively structure your HTML content. Block-level elements provide the foundation for your page layout, while inline elements enhance the presentation of specific text within those blocks. Remember, this distinction is essential for building well-organized and visually appealing web pages.
Block-level Elements
HTML elements come in various flavors, each playing a specific role in structuring your web page's content. Block-level elements are fundamental building blocks that define distinct sections and paragraphs within your HTML document.
List of Block-Level Elements:
The following table summarizes commonly used block-level elements in HTML:
Element
Description
Example
<div>
A generic container element for grouping other elements.
<div class="container"><h1>My Page Title</h1><p>This is some content.</p></div>
<h1> to <h6>
Headings of varying sizes, <h1> being the most prominent and <h6> the least.
Represents contact information for the author or owner of a document.
<address>123 Main Street<br>Anytown, CA 12345</address>
<blockquote>
Defines a block of quoted text.
<blockquote><p>This is a quote.</p></blockquote>
<pre>
Defines preformatted text, preserving whitespace and line breaks.
<pre>This is some preformatted text.
Lines will be preserved.</pre>
<table>
Defines a tabular data structure with rows and columns.
Refer to advanced documentation for tables.
<form>
Defines a form for user input, often containing input elements like text fields and buttons.
Refer to advanced documentation for forms.
<details>
Defines a disclosure widget, revealing additional details when opened by the user.
Refer to advanced documentation for details.
<dialog>
Defines a modal dialog box that is displayed on top of the current page content.
Refer to advanced documentation for dialogs.
Block-level elements typically start on a new line and occupy the full horizontal space available within their container. They stack vertically, creating the overall layout of your web page. By effectively using block-level elements, you can structure your HTML content in a clear and organized manner.
Inline Elements
HTML offers various element types to structure and style web content. Inline elements, as the name suggests, are designed to be embedded within block-level elements like paragraphs (<p>) or headings (<h1>). They format specific portions of text and don't typically start on a new line.
List of Inline Elements in HTML:
The following table summarizes some commonly used inline elements and their purposes:
Element
Description
Example
<a> (anchor)
Creates a hyperlink for navigating to other web pages or sections within the same page.
Indicates a title of a creative work (book, film, song, etc.).
<cite>The Lord of the Rings</cite> by J.R.R. Tolkien
<q> (inline quote)
Represents a short inline quotation.
<q>The quote is: "Knowledge is power."</q>
<dfn> (definition)
Indicates the term being defined within the context.
<dfn>A variable is a named storage location in a computer program.</dfn>
<del> (deleted text)
Represents deleted text content, often used for revisions or corrections.
<del>This text has been deleted.</del>
<ins> (inserted text)
Represents inserted text content, often used for revisions or additions.
<ins>This text has been inserted.</ins>
Inline elements provide a powerful way to format specific portions of text within your HTML content. By effectively using these elements, you can enhance the readability and visual appeal of your web pages.
HTML Div Element Last updated:
June 24, 2024, 12:32 a.m.
The <div> element, often referred to as a "division element," is a fundamental building block in HTML. It serves as a versatile container for your web page content. This element has no inherent meaning on its own, but it empowers you to group related elements and apply styles for organization and presentation.
Think of a <div> as a box on your web page. It can hold anything from text and images to other HTML elements, creating sections or structuring your layout. The true power of the <div> lies in its ability to be styled using CSS. You can control the appearance of this "box" by defining its background color, borders, and other visual aspects.
By effectively utilizing multiple <div> elements, you can achieve a modular and well-organized web page structure. Each <div> can hold its own content and styles, allowing for flexibility and customization. As you delve deeper into web development, you'll encounter more advanced layout techniques like Flexbox and Grid, which build upon the foundation provided by the <div> element.
Mastering the <div> element is an essential first step in crafting well-structured and visually appealing web pages. Remember, this versatile element is a cornerstone of HTML layout, offering a strong foundation for your web development journey.
Div Element
The <div> element, also known as a "division element," is a fundamental building block in HTML. It serves as a generic container for content, allowing you to group related elements and apply styles for organization and presentation.
Structuring Your Page:
Imagine a toolbox filled with compartments. The <div> element acts like those compartments, holding specific content within your web page. You can nest multiple <div> elements to create sections, layouts, or group elements for styling purposes.
You can control how content within a <div> element is positioned. Here's how to center a <div> horizontally:
<div style="text-align: center;">This text is centered in the div.</div> <div style="margin: 0 auto; width: 50%;">This div is centered with a width of 50%.</div>
Building Layouts:
For more complex layouts, you can leverage several techniques beyond basic <div> elements:
Float: Allows elements to float left or right alongside other content.
Inline-block: Enables elements to behave like inline elements but retain width and height for side-by-side placement.
Flexbox: Offers a flexible approach to positioning and aligning elements within a container.
Grid: Provides a powerful grid-based system for creating complex layouts.
By mastering the <div> element and exploring these advanced layout techniques, you can build well-structured and visually appealing web pages. Remember, the possibilities are vast!
HTML Classes And ID Last updated:
June 24, 2024, 9:45 p.m.
Enhancing the organization and presentation of your HTML documents involves effectively using classes and IDs. This guide introduces these essential concepts.
Classes:
Classes are used to categorize similar elements. You can assign the same class name to multiple elements to apply consistent styles or behaviors using CSS.
This promotes code reusability and maintainability. Imagine styling all your buttons with a single class instead of repeating styles for each button individually.
IDs serve as unique identifiers for a single element within a web page. They are ideal for targeting specific elements with CSS or for JavaScript interactions.
Use IDs sparingly, as they should only identify one element.
Example:
<h1 id="main-heading">This is the main heading</h1>

#main-heading {  /* CSS rule targeting the ID */
  font-size: 2em;
  text-align: center;
}
Choosing Between Classes and IDs:
Use classes for styling groups of similar elements.
Use IDs for uniquely identifying and targeting specific elements.
By mastering classes and IDs, you can structure your HTML for better organization and leverage CSS to create visually appealing and well-styled web pages. Remember, a well-defined structure is the foundation for a successful web application.
HTML class Attribute
The class attribute in HTML empowers you to group elements and apply styles efficiently. It acts like a categorization tag, allowing you to target elements with specific styles defined in your CSS.
Using theclassAttribute:
Assign a class name (one or more words separated by hyphens) within the class attribute of an HTML element.
<p class="important">This is important information.</p>
In your CSS, create a style rule targeting the class name using a dot (.) followed by the class name.
.important {
    color: red;
    font-weight: bold;
}
The Syntax for Class:
Class names are case-sensitive (.important is different from .Important).
You can use hyphens to improve readability (e.g., text-center).
Avoid spaces within class names (use hyphens instead).
Multiple Classes:
An element can have multiple class names assigned, separated by spaces:
<h1 class="main-heading large-text">This is the main heading</h1>
In this example, the <h1> element will receive styles from both the .main-heading and .large-text classes.
Different Elements Can Share the Same Class:
The same class name can be applied to various elements to style them similarly:
<p class="highlight">This paragraph is highlighted.</p>
<span class="highlight">This text is also highlighted.</span>
.highlight {
    background-color: yellow;
}
Use of theclassAttribute in JavaScript:
You can access and manipulate element classes using JavaScript.
The classList property of an element provides methods for adding, removing, and toggling classes.
let element = document.getElementById("myElement");
element.classList.add("active");  // Add the "active" class
element.classList.remove("hidden");  // Remove the "hidden" class
By effectively using the class attribute, you can maintain clean and reusable styles in your HTML documents. Remember, it promotes better organization and simplifies styling complex web pages.
HTML id Attribute
The id attribute in HTML assigns a unique identifier to an element within a document. This ID allows you to target that specific element for styling, scripting, or creating links.
Using theidAttribute:
The id attribute is defined within the opening tag of an HTML element.
The value assigned to the id attribute must be unique within the document.
Common use cases include:
Targeting elements for specific styles using CSS.
Creating bookmarks for linking to specific sections within a page.
Accessing elements using JavaScript for dynamic manipulation.
<h1 id="main-heading">This is the main heading</h1>
<p id="intro-text">This is the introductory text.</p>
Difference Between Class and ID:
id: Unique identifier for a single element.
class: Can be applied to multiple elements to define a category or style.
HTML Bookmarks with ID and Links:
You can leverage the id attribute to create bookmarks within your HTML document and link to them from other parts of the page or even external documents.
Assign a unique id to the element you want to create a bookmark for.
Create a link element <a> with the href attribute set to # followed by the element's id.
<h2 id="content-section">This is the content section</h2>
<a href="#content-section">Jump to Content</a>
Using theidAttribute in JavaScript:
JavaScript can access elements using their id. This allows you to manipulate the content, style, or behavior of specific elements dynamically.
<button id="change-color">Change Color</button>
let button = document.getElementById("change-color");
button.addEventListener("click", function() {
  let heading = document.getElementById("main-heading");
  heading.style.color = "blue";
});
In this example, clicking the button with the id of "change-color" triggers a JavaScript function that finds the element with the id of "main-heading" and changes its text color to blue.
By effectively using the id attribute, you enhance the organization, accessibility, and interactivity of your web pages. Remember, unique IDs are key to targeting specific elements for styling and scripting purposes.
HTML Iframes And File Paths Last updated:
June 24, 2024, 9:37 p.m.
Enhancing your web pages with external content or creating modular components requires effective tools. This documentation explores two key concepts: HTML Iframes and HTML File Paths.
HTML Iframes:
Imagine a window within your web page that displays content from another source. Iframes (<iframe>) elements provide this functionality, allowing you to embed external web pages, applications, or even videos directly into your HTML document. This enables you to leverage existing content without duplicating code or functionalities.
Benefits of Iframes:
Content Reusability: Integrate functionalities or content from external sources seamlessly.
Dynamic Content: Display live content (e.g., stock quotes, news feeds) within your page.
Modular Design: Create reusable iframe components for specific purposes.
HTML File Paths:
When embedding external content or including resources like images, CSS files, or JavaScript scripts within your HTML, you need to specify their locations. This is where HTML File Paths come into play. They define the path (relative or absolute) from the current HTML document to the desired resource.
Specifying File Paths:
Relative Paths: Use relative paths (e.g., "./styles.css") to reference resources within the same directory or subdirectories.
Absolute Paths: Employ absolute paths (e.g., "https://www.example.com/script.js") to specify the complete URL of the resource if it resides on a different server.
By mastering Iframes and File Paths, you unlock powerful techniques to create dynamic and visually appealing web pages that leverage external content effectively. Remember, understanding these concepts empowers you to build richer and more interactive user experiences.
HTML Iframes
An iframe, short for "inline frame," is an HTML element that embeds another HTML document within the current page. This functionality allows you to seamlessly integrate external content, such as videos, maps, or even entire web pages, into your own website.
HTML Iframe Syntax:
The <iframe> element defines an iframe. Here's the basic syntax:
By specifying the width and height attributes, you control the dimensions of the embedded content within your page. Omitting these attributes might result in unexpected sizing or distorted content.
Iframe - Remove the Border:
If you prefer a seamless integration, you can remove the default iframe border using the frameborder attribute:
<iframe src="..." frameborder="0"></iframe>
Iframe - Target for a Link:
The target attribute within an <a> (anchor) tag can be set to an iframe's name, making the link open the linked content within the iframe:
<a href="https://www.example.com/another_page" target="myIframe">Open in iframe</a>

<iframe src="about:blank" name="myIframe" width="400" height="300"></iframe>
Important Considerations:
Iframes can introduce security risks if the source is not trusted. Be cautious about embedding content from unknown origins.
Iframes can affect page load times depending on the size and complexity of the embedded content.
Use iframes judiciously, ensuring they add value and enhance the user experience on your web page.
By effectively utilizing iframes, you can create a more dynamic and engaging web experience for your users. Remember, responsible use and attention to security are key!
HTML File Paths
HTML file paths are essential for referencing external resources, like images, stylesheets, or JavaScript files, within your web page. They act as instructions for the browser, guiding it to the location of these resources.
Understanding HTML File Paths:
Imagine your website as a folder structure on your computer. Each HTML file, image, and other resource resides within this structure.
File paths specify the route the browser needs to take to locate a particular resource relative to the current HTML file.
This example uses an absolute path referencing a stylesheet located on a different server (https://www.example.com).
Relative File Paths:
Specify the location of the resource relative to the current HTML file.
<script src="./scripts/script.js"></script>
Here, the ./scripts/script.js path indicates a JavaScript file named "script.js" within a subfolder called "scripts" relative to the current HTML file.
Choosing the Right Path:
Relative paths are generally preferred for maintainability and flexibility. If you move your website files to a different location, relative paths will still work as long as the folder structure remains the same.
Absolute paths can be useful in specific scenarios, such as referencing resources hosted on a different domain.
Best Practices:
Maintain a consistent folder structure for your website files.
Use clear and descriptive file names for resources.
Double-check your file paths to avoid broken links or errors.
By effectively using file paths, you ensure your web pages display all necessary resources correctly, creating a seamless user experience.
HTML Layout & Responsive Last updated:
June 24, 2024, 9:32 p.m.
Crafting visually appealing and user-friendly web pages is key to a successful online presence. This documentation introduces two fundamental concepts: HTML Layout and Responsive Design.
HTML Layout: The Foundation
HTML Layout refers to the arrangement and organization of content on a web page.
It defines the structure and placement of elements like headings, paragraphs, images, and forms.
Effective layout improves readability, usability, and the overall visual appeal of your page.
HTML provides various elements like <div>, <section>, and <article> to structure your content and build your layout.
Responsive Design: Adapting to Any Screen
Responsive design ensures your web page adapts its layout to different screen sizes and devices (desktops, tablets, mobiles).
This is crucial in today's world where users access web content from a variety of devices.
Responsive design techniques involve using flexible layouts, media queries, and fluid images to optimize the user experience across different screen sizes.
The Perfect Blend:
A strong foundation in HTML layout combined with the power of responsive design empowers you to create web pages that not only look good but also function flawlessly on any device. This ensures a seamless and positive experience for all your users.
Remember, mastering these concepts is essential for building modern and user-centric web applications.
HTML Layout
HTML layout establishes the structure and organization of your web page's content. It defines how elements are positioned and displayed on the screen, creating a user-friendly and visually appealing experience. This guide explores various HTML layout techniques and how CSS complements them.
HTML Layout Elements:
Block-level elements: These elements (like headings, paragraphs, <div>, etc.) typically start on a new line and occupy the full available width by default.
Inline elements: These elements (like <span>, <a>, <strong>, etc.) reside on the same line with other content and only occupy the space needed for their content.
Understanding these element types is crucial for basic layout construction.
HTML Layout Techniques:
Basic Layout with Block-level Elements: You can achieve a simple layout by stacking block-level elements vertically one after another.
Tables (for simple layouts): While not ideal for modern layouts due to accessibility concerns, tables can be used for basic layouts where elements need specific positioning in rows and columns.
CSS Frameworks:
CSS frameworks like Bootstrap or Foundation provide pre-defined layout components and classes that simplify the creation of responsive web pages. They offer a foundation for building complex layouts without writing extensive CSS code from scratch.
CSS Float Layout:
The float property allows elements to float to the left or right of their container, enabling elements to be positioned side-by-side. However, floating elements can cause layout issues and are generally not recommended for modern layouts.
Flexbox provides a more modern and flexible approach to layout. It allows you to define how child elements are positioned within a container, with control over alignment, sizing, and order.
Grid layout offers a powerful grid-based system for creating complex layouts. You define rows and columns within a container and position elements within these grid cells.
The best layout technique depends on your project's requirements and complexity. For simple layouts, basic HTML with block-level elements might suffice. For more complex or responsive layouts, consider CSS Flexbox or Grid for their flexibility and maintainability. Remember, a combination of techniques can be used to achieve your desired layout.
HTML Responsive
What is Responsive Web Design?
Responsive web design (RWD) is an approach to web development that ensures websites render optimally across various devices (desktop computers, tablets, smartphones, etc.). This ensures a seamless user experience regardless of screen size or device. HTML plays a crucial role in establishing the foundation for responsive design.
Setting The Viewport:
The <meta name="viewport"> tag within the <head> section of your HTML document controls how the browser scales and displays your content. A common viewport meta tag for responsive design is:
This provides the browser with different image options based on the viewport width and allows it to choose the most suitable one.
Using CSS Media Queries:
<img src="image.jpg" alt="Responsive image">
@media only screen and (max-width: 600px) {
     img {
         width: 100%;
     }
}
This CSS rule ensures the image takes up 100% of the available width on screens smaller than 600px.
Responsive Text Size:
It's essential to ensure text remains readable on all devices. Use relative font sizes (ems or rems) instead of fixed pixel values. This allows the browser to scale the text based on the user's preferences.
<p style="font-size: 1.2em;">This text will adjust its size based on the device.</p>
Media Queries:
Media queries are CSS rules that allow you to apply styles based on specific device characteristics like screen size, orientation, or resolution. You can use them to adjust layouts, styles, and content visibility for different devices.
@media only screen and (max-width: 768px) {
    .content {
        flex-direction: column;  /* Change layout for smaller screens */
    }
}
In summary, by incorporating responsive design techniques into your HTML structure and utilizing CSS effectively, you can create websites that adapt and deliver an optimal user experience across all devices. Remember, responsive design is essential for creating truly accessible and user-friendly web experiences.
HTML Head Last updated:
June 24, 2024, 9:29 p.m.
The <head> element in HTML, though unseen on the web page itself, plays a crucial role in how your page is presented and understood. It acts as a command center, providing essential metadata about your document to browsers and search engines.
Imagine a book – the cover art and title page (the <head>) give you vital information about the book's content before you even open it. Similarly, the <head> element in your HTML document conveys important details about your web page, including:
The page title: This appears in the browser tab and search engine results.
Character encoding: Defines the character set used in your document, ensuring proper display of text.
Links to external resources: References external stylesheets (CSS) and JavaScript files used by your page.
Meta information: Provides additional details like author, keywords, and page description.
By incorporating these elements within the <head>, you enhance the readability, discoverability, and overall user experience of your web page. Remember, a well-defined <head> is essential for creating a well-structured and informative HTML document.
HTML - The Head Element
The <head> element sits at the beginning of your HTML document, acting as a control center for metadata and resources essential for how your page is displayed and interpreted. While not directly visible to users, the content within the <head> significantly impacts the user experience.
Essential Elements Within the<head>:
Here's a breakdown of key elements you'll encounter within the <head>:
Tag
Description
Example Code
<title>
Defines the title of your web page, displayed in the browser tab and search results.
<title>My Awesome Website</title>
<style>
Houses CSS styles directly embedded within the HTML document.
<style>body { color: blue; }</style>
<link>
Links to external CSS stylesheets for cleaner and more maintainable code.
<link rel="stylesheet" href="styles.css">
<meta>
Provides metadata about your document, like character encoding and author information.
<meta charset="UTF-8">
A specific type of <meta> tag allows you to set the viewport for responsive design.
Loads external JavaScript files or embeds JavaScript code directly within the <head>.
<script src="script.js"></script>
<base>
Sets a base URL for all relative links within the document.
<base href="https://www.example.com/">
The <title> element is crucial for search engine optimization (SEO) and user identification.
Separating styles using <link> to external stylesheets promotes better organization and maintainability.
The viewport meta tag ensures proper rendering on various devices.
By effectively utilizing these elements within the <head>, you provide valuable information to browsers and search engines, ultimately enhancing the presentation and functionality of your web pages.
HTML Computer Code & Semantic Last updated:
June 24, 2024, 9:25 p.m.
HTML (HyperText Markup Language) is the cornerstone of web development. It provides the foundation for creating web pages by defining the structure and content. This documentation explores two key aspects of HTML: computer code and semantic elements.
HTML as Computer Code:
At its core, HTML consists of markup tags written within angle brackets (< and >). These tags define elements that structure the content and appearance of a web page.
Elements often come in pairs, with an opening tag and a closing tag (</tag>) to indicate the element's scope.
While HTML offers flexibility in structuring content, it doesn't inherently convey the meaning of that content.
Example:
<h1>Welcome!</h1> <p>This is a paragraph.</p>
Introducing Semantic HTML:
Semantic HTML goes beyond basic structure by using tags that describe the meaning and purpose of the content.
This approach improves accessibility and clarity for both users and search engines.
Semantic elements like <h1> for headings, <p> for paragraphs, and <article> for self-contained content sections make the code more meaningful.
Example (Semantic):
<header>
  <h1>Welcome!</h1>
</header>
<main>
  <p>This is a paragraph.</p>
</main>
By understanding both the computer code nature of HTML and the power of semantic elements, you can create web pages that are well-structured, maintainable, and accessible to a wider audience. Remember, meaningful code leads to a better web experience for everyone.
Computer Code Elements
When incorporating code snippets within your HTML documents, utilizing specific elements enhances readability and conveys the purpose of the code. Here's a breakdown of these elements:
HTML<kbd>Element (For Keyboard Input):
Use the <kbd> element to represent user input from the keyboard, such as key combinations or specific keys.
It displays the text in a monospaced font, mimicking the appearance of typed characters.
Press <kbd>Ctrl+Shift+S</kbd> to save the file.
HTML<samp>Element (For Program Output):
The <samp> element is employed to display sample output from a computer program.
Similar to <kbd>, it uses a monospaced font to differentiate it from surrounding text.
The program output: <samp>Hello, world!</samp>
HTML<code>Element (For Computer Code):
The <code> element is the most generic for inline code snippets within your HTML content.
It displays the code in a monospaced font, but it may not provide additional styling cues compared to other elements.
This function takes two numbers as arguments: <code>function sum(a, b) { return a + b; }</code>
HTML<var>Element (For Variables):
The <var> element is used to represent variable names within your code.
While also using a monospaced font, it might offer distinct visual differentiation from surrounding text, depending on browser support.
The value of the variable `<var>x</var>` is 10.
Choosing the Right Element:
Use <kbd> for specific key or keyboard input emphasis.
Use <samp> for sample program output.
Use <code> for general inline code snippets.
Use <var> for variable names within code context.
Additional Considerations:
For more complex code blocks, consider using the <pre> element to create preformatted text sections, often styled with a monospaced font and preserving whitespace.
Utilize CSS to further style these elements for improved readability and visual consistency within your web pages.
By effectively incorporating these elements, you can enhance the clarity and presentation of code snippets within your HTML documents.
Semantic Elements
Semantic elements are the building blocks of a meaningful HTML document. They convey the nature and purpose of your content, not just its presentation. This approach enhances accessibility, search engine optimization (SEO), and overall web page structure.
What are Semantic Elements?
Unlike generic elements like <div>, semantic elements have a specific meaning. For example, the <article> element denotes an independent, self-contained piece of content, like a blog post or news article.
Semantic Elements in HTML:
HTML provides a variety of semantic elements for common content structures:
<section>: Represents a section of a document, typically a thematic grouping.
<section class="about-us">
    <h2>About Our Company</h2>
    <p>This section provides information about our company history and mission.</p>
</section>
<article>: Denotes a self-contained, reusable piece of content, like a news article, blog post, or forum topic.
Accessibility: Screen readers and assistive technologies can interpret the structure and meaning of your content for users with disabilities.
SEO: Search engines may use semantic elements to understand your content better, potentially improving your search ranking.
Maintainability: Semantic code is easier to understand and maintain for both you and other developers.
Semantic Elements Table:
Tag
Description
<section>
Represents a section of a document, typically a thematic grouping.
<article>
Denotes a self-contained, reusable piece of content, like a news article or blog post.
<header>
Defines a header for a document or section (headings, logos, etc.).
<footer>
Represents a footer containing information about the author, copyright, etc.
<nav>
Identifies a navigation section (links to different parts of the website).
<aside>
Denotes content tangentially related to the main content (sidebar, advertisement).
<figure>
Groups an image, diagram, or code snippet with its caption using <figcaption>.
By incorporating semantic elements into your HTML code, you create web pages that are not only visually appealing but also meaningful and accessible for everyone.
HTML Entities & Symbols Last updated:
June 24, 2024, 9:19 p.m.
While HTML provides a vast array of characters you can type directly, there are instances where you might encounter symbols or characters not readily available on your keyboard. This is where HTML entities and symbols come into play.
HTML Entities:
Represent special characters or symbols using a combination of ampersands (&), character codes, and a semicolon (;).
Offer a standardized way to include these characters within your HTML code, ensuring they display correctly across different browsers and platforms.
Registered Trademark (®): The entity ® displays the registered trademark symbol.
Accented Characters: Entities enable you to include accented characters like á (á = á) or ñ (ñ = ñ) used in various languages.
Beyond Basic Characters:
HTML entities extend beyond basic symbols. You can represent mathematical symbols (e.g., ? for infinity), geometric shapes, and other special characters using their corresponding entity codes.
By mastering HTML entities and symbols, you can enhance the richness and accuracy of your web content, ensuring it displays the intended characters across diverse user environments.
HTML Entities
HTML entities provide a way to represent special characters or characters that have a reserved meaning in HTML, ensuring their correct display on web pages. These entities are encoded using a specific format and can be used within your HTML code.
HTML Character Entities:
Character entities take the form &#characterCode; or &entityName;.
&#characterCode;:** Represents a character using its decimal or hexadecimal character code.
Example: b represents the letter "b" (decimal code for "b" is 98).
&entityName;:** Represents a character using a predefined named entity.
Example: & represents the ampersand character (&).
Non-breaking Space:
A common use case for entities is to represent a non-breaking space (). This ensures that a space is not broken across lines by the browser, even if it falls at the end of a line.
Example:
This sentence has a non-breaking space.
Some Useful HTML Character Entities:
Entity Name
Description
Example Code
&
Ampersand (&)
This sentence uses the ampersand character & to represent itself.
<
Less than (<)
This text shows the less than symbol < for comparison.
>
Greater than (>)
Scores are displayed as: 10 > 5 >.
"
Double quotation mark (")
"This is a quoted phrase" "This is a quoted phrase".
Use HTML entities sparingly, as they can make your code less readable.
Consider alternative solutions like CSS styling for some cases (e.g., non-breaking spaces).
Refer to a comprehensive list of HTML entities for more options ([https://www.w3schools.com/charsets/ref_html_symbols.asp](https://www.w3schools.com/charsets/ref_html_symbols.asp))
By understanding HTML entities, you can ensure that your web pages display characters correctly and avoid unintended rendering issues.
HTML Symbols
While standard keyboard characters cover most writing needs, HTML symbols provide a way to incorporate specialized characters, mathematical symbols, or international characters beyond the basic alphabet. This documentation explores how to use HTML symbol entities to enrich your web content.
HTML Symbol Entities:
Symbol entities are a way to represent symbols using HTML code.
They consist of an ampersand (&), the symbol name, and a semicolon (;).
Here's a table showcasing some common mathematical symbols and their corresponding entities:
Symbol
Entity Code
Description
∞
∞
Infinity
×
×
Multiplication sign
÷
÷
Division sign
<
<
Less than symbol
>
>
Greater than symbol
≤
≤
Less than or equal to
≥
≥
Greater than or equal to
π
π
Pi symbol
Example:
This equation shows that a squared plus b squared equals c squared: a<sup>2</sup> + b<sup>2</sup> = c<sup>2</sup>.
Additional Considerations:
Not all symbols have corresponding HTML entities. In such cases, you might need to use alternative methods like inserting images or using character codes from a specific font.
Be mindful of accessibility when using symbols. Consider providing alternative text descriptions for screen readers.
HTML symbol entities empower you to enhance your web content with a wider range of characters. By incorporating these symbols effectively, you can create more informative and engaging web pages. Remember, using symbols thoughtfully can improve the clarity and comprehensiveness of your content.
HTML Encoding & URL Encoding Last updated:
June 24, 2024, 9:13 p.m.
The web relies on efficient data exchange between browsers and servers. However, certain characters can cause issues if transmitted in their raw form. This is where HTML encoding and URL encoding come into play, ensuring your data is interpreted correctly across different systems.
HTML Encoding:
Focuses on representing special characters within HTML documents.
Characters like <, >, and & have specific meanings in HTML. By encoding them using entities (e.g., <, >, &), you prevent them from being interpreted as code, ensuring they display as intended text.
Helps maintain the structure and integrity of your HTML content.
URL Encoding:
Deals with encoding data that appears within URLs.
Certain characters like spaces, #, and & have special meanings in URLs. Encoding them (e.g., %20 for space, %23 for #, %26 for &) ensures they are transmitted correctly as part of the URL path.
Prevents misinterpretations and allows web servers to understand the intended resource being requested.
Both encoding techniques play a crucial role in ensuring smooth communication and data integrity on the web. By understanding their purposes and applications, you can create robust and reliable web experiences.
HTML Encoding
Character encoding plays a crucial role in ensuring that characters are displayed correctly on web pages. HTML provides mechanisms to specify the character set used, guaranteeing that symbols and letters are interpreted as intended across different systems.
The HTMLcharsetAttribute:
The charset attribute within the <meta> tag defines the character encoding for your HTML document. This informs the browser how to interpret the bytes representing characters on your page.
<meta charset="UTF-8">
Common Character Sets:
Here's an overview of some common character sets:
ASCII (American Standard Code for Information Interchange): This basic 7-bit character set covers basic Latin characters, numbers, and symbols (alphanumeric characters).
ANSI (American National Standards Institute) Character Sets: These extend ASCII to include additional characters, often specific to a particular region (e.g., ANSI Cp1252 for Western European characters).
ISO-8859-1 (Latin-1): This is an extension of ASCII that includes accented characters commonly used in Western European languages.
UTF-8 (Unicode Transformation Format - 8-bit): This is a widely adopted character encoding capable of representing a vast range of characters from most languages. Due to its versatility, UTF-8 is the recommended encoding for modern web development.
Choosing the Right Character Set:
For broadest compatibility and representation of various languages, UTF-8 is the preferred choice. It ensures that characters are displayed accurately across different systems.
Example: Character Set Impact:
Consider the following:
Incorrect Encoding: If a web page encoded in ISO-8859-1 is viewed on a system expecting UTF-8, characters like "á" (a with an acute accent) might display incorrectly.
Correct Encoding: By specifying UTF-8 encoding, you guarantee that characters are interpreted accurately, regardless of the viewing system's default settings.
By understanding HTML encoding and using the appropriate charset attribute, you ensure that your web pages display characters correctly for users around the world. Remember, proper character encoding is essential for a seamless user experience.
URL Encoding
URLs (Uniform Resource Locators) are the addresses used to locate resources on the internet. They play a crucial role in directing users and browsers to specific web pages or files. However, certain characters within URLs can cause issues if not handled properly. This documentation explains URL encoding, a technique that ensures seamless data transmission in web addresses.
URL - Uniform Resource Locator:
A URL is a string that specifies the location of a resource on the internet. It typically follows a format like this:
Protocol: Identifies the communication method (e.g., http, https, ftp).
Host: Specifies the domain name or IP address of the server.
Port (Optional): Denotes the port number on the server (usually omitted for standard ports).
Path: Indicates the location of the resource on the server (e.g., a specific file or directory).
Query String (Optional): Contains additional data passed to the server (e.g., search parameters).
Fragment Identifier (Optional): Points to a specific section within the resource (often used for in-page navigation).
Common URL Schemes (Table):
Scheme
Description
Example
http
Hypertext Transfer Protocol (standard web protocol)
http://www.example.com/index.html
https
Secure Hypertext Transfer Protocol (encrypted)
https://www.example.com/secure-page.html
ftp
File Transfer Protocol (for file transfer)
ftp://user:password@ftp.example.com/file.txt
mailto
Creates a mailto link to launch an email client
mailto:someone@example.com?subject=Hi
tel
Creates a tel link to initiate a phone call
tel:123-456-7890
URL Encoding:
While URLs can contain letters, numbers, and some special characters (e.g., '-', '.', '_', '~'), others like spaces, punctuation marks, or non-alphanumeric characters can disrupt communication. URL encoding addresses this by converting these problematic characters into a format understood by web browsers and servers.
ASCII Encoding Examples:
In URL encoding, a character is replaced by a percentage sign (`%`) followed by its hexadecimal code representation according to the ASCII character encoding standard. Here are some examples:
Space () becomes `%20`
Plus sign (+) becomes `%2B`
Ampersand (&) becomes `%26`
Question mark (?) becomes `%3F`
By encoding these characters, you ensure that your URL is interpreted correctly and reaches the intended destination.
URL encoding plays a vital role in ensuring the smooth transmission of data within web addresses. By understanding common URL schemes and the concept of URL encoding, you can create well-formed URLs and avoid errors in your web development endeavors. Remember, proper URL encoding contributes to a robust and reliable web experience.
HTML Vs XHTML Last updated:
June 24, 2024, 9:09 p.m.
HTML (Hypertext Markup Language) and XHTML (Extensible Hypertext Markup Language) are both foundational languages for building web pages. However, they differ in their approach and purpose.
HTML:
The longstanding standard for web page structure.
Offers a more relaxed syntax, allowing for some flexibility in formatting and element attributes.
Primarily focused on content representation and functionality.
XHTML:
An XML-based version of HTML, adhering to stricter syntax rules.
Emphasizes well-formed code, ensuring better validation and compatibility.
Intended to integrate seamlessly with other XML-based technologies.
Choosing Between Them:
HTML: Ideal for most web development scenarios due to its simplicity and widespread browser support.
XHTML: Preferred when stricter validation, future-proofing, or integration with XML is crucial.
While XHTML offered potential benefits, HTML continues to evolve and enjoys strong browser support. The decision often boils down to project requirements and developer preference. Both languages can create functional and visually appealing web pages.
XHTML
XHTML (eXtensible HyperText Markup Language) was an attempt to create a more robust and future-proof version of HTML. While no longer the primary language for web development, understanding its principles can be beneficial.
What is XHTML?
XHTML is a reformulation of HTML as a strict XML application. It combines the familiar elements and structure of HTML with the stricter rules and syntax of XML.
Why XHTML?
The primary goals of XHTML were:
Improved validation: XHTML allows for stricter validation, ensuring well-formed and more predictable code.
Enhanced integration: XHTML aimed to better integrate with other XML-based technologies.
Separation of concerns: XHTML separates content from presentation, promoting cleaner code and easier styling with CSS.
The Most Important Differences from HTML:
Here's a breakdown of key differences between XHTML and HTML:
DOCTYPE Declaration: XHTML requires a strict DOCTYPE declaration specifying the document type.
<!DOCTYPE html PUBLIC "-//W3C//DTD XHTML 1.0 Strict//EN" "http://www.w3.org/TR/xhtml1/DTD/xhtml1-strict.dtd">
Proper Nesting: XHTML elements must be properly nested, ensuring a well-formed structure.
Closed Elements: All XHTML elements must be explicitly closed with a closing tag, even if they are void elements in HTML.
<br/> <br>
Lowercase Requirement: Both element and attribute names in XHTML must be in lowercase.
Attribute Value Quotes: All attribute values in XHTML must be enclosed in either single or double quotes.
No Attribute Minimization:XHTML does not allow attribute minimization (omitting the value for certain attributes), which is sometimes possible in HTML.
While XHTML is not the dominant language today, understanding its stricter rules can help you write cleaner and more maintainable HTML code. The emphasis on proper nesting, closing elements, and well-defined attributes promotes best practices for web development.
HTML Forms Last updated:
June 24, 2024, 9:06 p.m.
HTML forms are essential elements for gathering user input on your web pages. They enable users to interact with your application by providing information, making selections, and submitting data to the server.
The Foundation:<form>Element:
The <form> element serves as the container for all form controls and defines how the collected data is submitted. It has crucial attributes like:
action: Specifies the URL where the form data will be sent (e.g., a server-side script).
method: Defines the HTTP method used to submit the data (usually GET or POST).
Form Controls: The<input>Element:
The <input> element is the cornerstone of user input within forms. It comes in various types, each serving a specific purpose:
Type
Description
text
Creates a single-line text field for users to enter textual data.
email
Creates a text field specifically for email addresses. The browser may perform basic validation.
password
Creates a text field where the entered characters are masked for security (typically used for passwords).
url
Creates a text field for entering URLs. The browser may perform basic validation.
number
Creates a text field for numeric input. May allow specifying minimum and maximum values.
checkbox
Represents a single on/off selection option. Multiple checkboxes can be selected.
radio
Represents a group of mutually exclusive options where only one can be selected at a time.
submit
Creates a button that triggers the form submission when clicked.
Enhancing User Experience:
Use the <lable> element to associate labels with form controls, improving readability and accessibility.
Employ radio buttons and checkboxes for multiple-choice scenarios.
Include a submit button (<input type="submit">) to initiate form submission.
Unique Identification: ThenameAttribute:
The name attribute for <input> elements assigns a unique identifier to each form control. This name is used to reference the submitted data on the server side.
By effectively combining these elements, you can create user-friendly and functional HTML forms for your web applications. Remember, clear labels and intuitive design are key to a positive user experience.
HTML Form Attributes
HTML forms are crucial components for gathering user input on web pages. Various attributes associated with form elements empower you to control how forms behave and interact with users. This documentation explores some key HTML form attributes.
TheactionAttribute:
Value: A URL specifying the page that will process the form submission.
Description: When a user submits the form, the browser sends the form data to the specified URL.
By effectively using these attributes, you can create well-behaved and user-friendly HTML forms for your web applications. Remember, understanding form attributes empowers you to control the data collection process on your web pages.
HTML Form Elements
HTML forms provide a powerful way to gather user input on your web page. This documentation explores the fundamental HTML form elements you'll need to create interactive and user-friendly forms.
The HTML<form>Element:
The foundation of any form is the <form> element. It defines the overall structure of the form and specifies how the collected data will be submitted (e.g., to a server-side script).
The <label> element associates a label text with a form element (usually an <input>). When a user clicks on the label text, it focuses the corresponding form element.
While often used for submitting forms, the <button> element offers more flexibility. You can define different functionalities using JavaScript by attaching event listeners.
The<feildset> and <legend>Elements:
The <feildset> element groups related form elements together. The <legend> element, placed within the <feildset>, provides a caption for the group.
The <datalist> element provides an auto-completion suggestion list for <input> elements.
The<output>Element:
The <output> element displays the result of a calculation or the value of an expression for user information. It's often used in conjunction with JavaScript.
By mastering these core HTML form elements, you can create robust and user-friendly forms to collect valuable data from your web page visitors. Remember, well-designed forms enhance the user experience and streamline data collection.
HTML Input Types
HTML input elements are essential for creating interactive forms on web pages. They allow users to enter and submit data, making your web applications dynamic and user-friendly. This documentation explores the various input types available in HTML.
HTML Input Types:
The <input> element comes with a variety of types, each serving a specific purpose:
text: Creates a single-line text input field for general text input (e.g., name, address).
password: Similar to text, but hides the entered characters with asterisks (*) for password input.
submit: Creates a button that submits the form data when clicked.
reset: Creates a button that resets the form to its initial state.
radio: Used to create radio buttons for selecting one option from a group of choices. Multiple radio buttons with the same `name` attribute belong to the same group.
Red
Green
Blue
checkbox: Used to create checkboxes for selecting multiple options. Each checkbox has its own name attribute.
Pepperoni
Mushrooms
button: Creates a generic button element. You can define custom functionality using JavaScript.
color: Creates an input field for selecting a color using a color picker.
date: Creates an input field for selecting a date.
datetime-local: Creates an input field for selecting a date and time.
email: Creates an input field for entering an email address. The browser may perform basic validation to ensure the entered value resembles a valid email format.
image: Creates a submit button that displays an image.
file: Creates an input field for selecting a file to upload.
hidden: Creates a hidden input field that is not displayed on the page but can be used to submit form data.
month: Creates an input field for selecting a month.
number: Creates an input field for entering a numeric value. You can specify restrictions using additional attributes.
Input Restrictions:
Here's a table outlining some attributes for restricting input types:
Attribute
Description
min
Sets the minimum allowed value for numeric inputs.
max
Sets the maximum allowed value for numeric inputs.
step
Defines the increment or decrement value for numeric inputs (e.g., step="0.1" for decimals).
pattern
Defines a regular expression to validate the input format (e.g., pattern="[A-Za-z]+" for letters only).
required
Makes the input field mandatory (prevents form submission without a value).
disabled
Disables the input field, making it uneditable.
By effectively utilizing these input types and understanding their attributes, you can create versatile and user-friendly forms to gather valuable data from your users. Remember, clear and well-designed forms enhance the user experience of your web applications.
HTML Input Attributes
HTML input elements allow users to interact with your web pages by providing data. Beyond the basic element types (text, password, checkbox, etc.), a rich set of attributes empowers you to customize their behavior and appearance.
ThevalueAttribute:
Sets the initial value displayed within the input element.
<input type="text" value="John Doe" />
ThereadonlyAttribute:
Prevents users from modifying the input's value.
<input type="text" value="Username" readonly />
ThedisabledAttribute:
Disables the input element, making it uneditable and unselectable.
Creates an association between an input element and a <datalist> element, providing auto-completion suggestions.
TheautocompleteAttribute:
Controls browser behavior regarding auto-completion of the input value based on browsing history or settings.
By effectively utilizing these attributes, you can create user-friendly and interactive input elements within your HTML forms, enhancing the data collection experience.
Input Form Attributes
HTML forms provide a crucial mechanism for user interaction on web pages. They allow users to submit data, such as text, passwords, or choices, to the server for processing. Various attributes on the <form> element and its child input elements control the behavior and functionality of these forms.
Input Form Attributes:
Here's a breakdown of key attributes that enhance your forms:
formAttribute:
Associates an <input> element with a specific <form> element.
Ensures the input data is submitted with the designated form.
By effectively utilizing these attributes, you can create robust and user-friendly forms that streamline data collection and interaction on your web pages. Remember, well-crafted forms are essential for a seamless user experience.
HTML Graphics Last updated:
June 25, 2024, 10:16 p.m.
Graphics are essential for creating visually appealing and engaging web pages. HTML, the foundation of web content, provides a starting point for incorporating graphics into your website. While HTML itself doesn't directly render complex visuals, it offers mechanisms to integrate various graphic elements.
There are two primary approaches to achieve captivating graphics in your web pages:
Image Embedding:
HTML's <img> element allows you to embed images (such as JPEGs, PNGs, GIFs) stored on a server into your web page.
You can specify the image source using the src attribute and add alternative text for accessibility using the alt attribute.
Canvas and Scalable Vector Graphics (SVG):
For more dynamic and interactive graphics, HTML relies on external technologies like canvas and SVG.
Canvas, introduced in HTML5, offers a script-based approach for drawing shapes, lines, and images directly on the web page using JavaScript.
SVG, an XML-based format, allows you to define vector graphics that scale flawlessly at any resolution, making them ideal for logos and illustrations.
By understanding these core concepts and exploring the capabilities of canvas and SVG, you can add a rich layer of visual elements to your web pages, enhancing user experience and bringing your website to life.
HTML Canvas
The HTML <canvas> element unlocks a world of possibilities for creating dynamic and interactive graphics within your web pages. This documentation explores the concept of canvas and how to integrate it with JavaScript.
What is HTML Canvas?
The <canvas> element serves as a dedicated drawing surface within your web page. It allows you to use JavaScript to manipulate pixels and render various graphical elements like shapes, lines, images, and text.
Canvas Examples:
Here are some examples of what you can achieve with canvas:
Animations: Create smooth and engaging animations for visual effects or user interactions.
Games: Build basic 2D games with interactive elements controlled by user input.
Data Visualization: Represent data visually using charts, graphs, and interactive visualizations.
Adding JavaScript:
The <canvas> element itself doesn't render graphics directly. It acts as a blank canvas waiting for your artistic touch through JavaScript. You'll need to use JavaScript to interact with the canvas using the Canvas API, a set of methods and properties for drawing and manipulating graphics.
Here's a basic example to get you started:
<!DOCTYPE html>
<html lang="en">
<head>
    <meta charset="UTF-8">
    <meta name="viewport" content="width=device-width, initial-scale=1.0">
    <title>Canvas Example</title>
</head>
<body>
    <canvas id="myCanvas" width="400" height="300"></canvas>
    <script>
        let canvas = document.getElementById("myCanvas");
        let ctx = canvas.getContext("2d");  // Get the drawing context

        // Draw a rectangle
        ctx.fillStyle = "blue";
        ctx.fillRect(50, 50, 100, 150);
    </script>
</body>
</html>
This code creates a canvas element with an ID of "myCanvas" and retrieves its 2D drawing context. Finally, it uses JavaScript to draw a blue rectangle on the canvas.
The HTML canvas, combined with JavaScript's Canvas API, empowers you to create dynamic and interactive graphics, enriching the user experience of your web pages. As you explore further, you'll unlock the potential for building visually stunning and engaging web applications.
HTML SVG
Scalable Vector Graphics (SVG) is a powerful technology for incorporating graphics into your web pages. Unlike traditional image formats (JPEG, PNG), SVG uses vector graphics, allowing for crisp visuals that can scale to any size without losing quality. This documentation explores integrating SVGs into HTML.
SVG (Scalable Vector Graphics):
SVG defines graphics using XML (Extensible Markup Language), making them text-based and highly flexible. This allows for:
Scalability: SVG graphics can be resized without pixelation or loss of quality.
Accessibility: SVGs can be programmatically manipulated and styled, improving accessibility for users with assistive technologies.
Animation: SVGs can be animated using CSS or JavaScript, creating dynamic visuals.
What is SVG?:
Imagine a drawing created with mathematical shapes (lines, curves, etc.) rather than individual pixels. This is the essence of SVG; it defines the image using code that can be scaled and manipulated.
The<svg>Element:
The <svg> element is the cornerstone for embedding SVG graphics in your HTML. It serves as a container for the SVG code, defining the size and other attributes of the graphic.
<svg width="200" height="100">
</svg>
SVG Circle:
Let's create a basic SVG circle using the <circle> element:
cx: X-coordinate of the circle's center (default: 0)
cy: Y-coordinate of the circle's center (default: 0)
r: Radius of the circle
fill: Fill color of the circle
Beyond the Basics:
SVG offers a vast array of shapes (rectangles, ellipses, paths) and functionalities beyond circles. You can define complex shapes, gradients, and even include text within your SVG.
By incorporating SVGs into your HTML, you can create high-quality, dynamic, and scalable graphics that enhance the visual appeal and user experience of your web pages. Remember, SVG is a powerful tool for modern web development!
HTML Media Last updated:
June 25, 2024, 10:21 p.m.
Multimedia refers to the integration of various media types – text, audio, images, animations, and video – into a single presentation. This convergence allows for a more engaging and interactive user experience compared to traditional media formats.
Multimedia Formats:
Multimedia content encompasses a wide range of formats, each serving a specific purpose:
Text: The foundation for conveying information, often used in conjunction with other media types.
Audio: Sounds, music, and voiceovers enhance user engagement and emotional impact.
Images: Photographs, illustrations, and graphics provide visual elements to complement text.
Animations: Moving images create dynamic and interactive experiences.
Video: Combines audio and moving visuals for a complete audio-visual experience.
The choice of multimedia format depends on the content you want to deliver and the desired user experience.
Common Video Formats (Table):
Format
Description
MP4
A widely used and versatile format supported by most platforms.
WebM
An open-source format known for its smaller file size and good web compatibility.
AVI
An older format commonly used on Windows systems.
MKV
A container format that can hold various video and audio codecs.
FLV
Often used for online video streaming, especially with Adobe Flash Player.
By understanding these formats, you can make informed decisions when creating or using multimedia content in your projects.
Multimedia presentations offer a powerful way to captivate your audience. By combining different media types strategically, you can create informative, engaging, and memorable experiences. Remember, the key lies in selecting the right formats to effectively deliver your message.
HTML Video
The HTML <video> element empowers you to embed video content directly into your web pages. This documentation explores its functionalities and usage.
The HTML<video>Element:
The <video> element acts as a container for video content, similar to how <img> displays images. It offers a flexible way to incorporate multimedia into your web pages, enhancing user engagement.
How it Works:
Include the <video> element within your HTML code.
Specify the video source using the src attribute, pointing to the video file location on your server.
Optionally, include fallback content within the <video> tags using <source> elements. These specify alternative video sources in different formats, ensuring broader browser compatibility.
<video width="400" height="300" controls>
  <source src="video.mp4" type="video/mp4">
  <source src="video.webm" type="video/webm">
  Your browser does not support the video tag.
</video>
HTML<video>Autoplay:
The autoplay attribute allows you to configure the video to start playing automatically when the page loads. However, this behavior can be disruptive for users, so use it cautiously.
Commonly supported video formats for the <video> element include:
MP4 (.mp4)
WebM (.webm)
Ogg (.ogg)
HTML Video - Media Types:
Specify the media type using the type attribute within the <source> element to indicate the format of the video source.
<source src="video.mp4" type="video/mp4">
HTML Video - Methods, Properties, and Events:
The <video> element supports various methods, properties, and events for advanced control:
Methods: Play, pause, mute, etc.
Properties: currentTime (current playback position), duration (total video duration), etc.
Events: play, pause, ended (fired when playback finishes), etc.
Exploring these functionalities allows you to create a more interactive video experience for your users.
The HTML <video> element unlocks the ability to embed videos seamlessly within your web pages. By understanding its core functionalities and exploring advanced options, you can enhance user engagement and create compelling multimedia experiences.
HTML Audio
The HTML <audio> element empowers you to embed sound content within your web pages, enriching the user experience with audio elements like music, sound effects, or voiceovers. This documentation delves into its functionalities and usage.
The HTML<audio>Element:
The <audio> element serves as a container for audio content. It specifies the source of the audio file using the src attribute.
Example:
<audio controls src="audio.mp3">
  Your browser does not support the audio element.
</audio>
The controls attribute adds playback controls (play, pause, volume) to the element.
Include a fallback message within the element to display in case the browser doesn't support the <audio> element.
HTML Audio - How It Works:
The browser fetches the audio file specified in the src attribute.
The audio data is decoded and loaded into memory.
Playback controls allow users to interact with the audio (play, pause, adjust volume).
HTML<audio>Autoplay:
The autoplay attribute can be used to make the audio start playing automatically when the page loads. However, this can be disruptive to users, so use it cautiously and consider providing a way to pause or mute the audio.
HTML Audio Formats:
Different browsers support various audio formats. Common options include:
MP3 (.mp3)
Ogg Vorbis (.ogg)
WAV (.wav)
HTML Audio - Media Types:
To ensure wider browser compatibility, you can specify multiple audio sources with different formats within the <audio> element using the <source> element.
<audio controls>
  <source src="audio.mp3" type="audio/mpeg">
  <source src="audio.ogg" type="audio/ogg">
  Your browser does not support the audio element.
</audio>
HTML Audio - Methods, Properties, and Events:
The <audio> element offers various properties and methods for scripting audio playback behavior. Events like play, pause, and ended allow you to respond to user interactions or control playback dynamically using JavaScript.
The <audio> element provides a powerful tool for adding sound to your web pages. By understanding its functionalities and exploring media formats, you can create engaging multimedia experiences for your users. Remember, consider user experience and accessibility when using autoplay and ensure proper fallback mechanisms.
HTML Plug-ins
While HTML itself doesn't have extensive built-in functionality for plugins, it offers mechanisms to embed external content using elements like <object> and <embed>. However, it's important to note that these elements have limitations and are generally discouraged in modern web development.
Plug-ins in HTML:
Traditionally, plug-ins referred to external applications or media players embedded within a web page.
Nowadays, this functionality is often achieved using more modern techniques like JavaScript frameworks or APIs.
The<object>Element:
This element allows you to embed various types of content, including multimedia (videos, audio), applets, or PDF documents.
It requires specifying the content source (data attribute) and the MIME type (type attribute) of the embedded content.
Example:
<object data="video.mp4" type="video/mp4">
  Your browser does not support the video tag.
</object>
The fallback content (Your browser does not support the video tag.) is displayed if the browser cannot render the embedded content.
The<embed>Element:
This element is less versatile than <object>. It's primarily used for embedding multimedia content (videos, audio) with limited control over appearance and behavior.
Due to its limitations and potential security concerns, <embed> is generally discouraged in favor of more modern approaches.
Important Considerations:
These elements offer limited control over the embedded content's behavior and appearance.
Modern browsers might not fully support these elements consistently.
There are more reliable and secure methods for embedding content in modern web development (e.g., using video/audio HTML elements or JavaScript frameworks).
While <object> and <embed> elements provide a historical perspective on embedding content in HTML, it's recommended to explore more modern and secure techniques for your web development projects.
HTML YouTube
While HTML itself doesn't struggle with video formats, incorporating YouTube videos into your webpage requires specific techniques. This guide explores how to embed YouTube videos using HTML and highlights common options for playback control.
YouTube Video ID:
Every YouTube video has a unique identifier, the video ID. This ID is located in the URL after the v= parameter (e.g., https://www.youtube.com/watch?v=dQw4w9WgXcQ has the video ID dQw4w9WgXcQ).
Playing a YouTube Video in HTML:
The <iframe> element allows you to embed external content, including YouTube videos.
Refer to YouTube's embed documentation for the latest options and functionalities.
Always consider user experience when using autoplay or hiding controls.
Explore YouTube's privacy-enhanced embed options for data privacy concerns.
By incorporating these techniques, you can seamlessly embed YouTube videos into your web pages, enhancing user engagement with your content.
HTML APIs Last updated:
June 24, 2024, 8:50 p.m.
Beyond the core structure and content of HTML, HTML APIs provide a gateway to interact with the browser environment and access various functionalities. These APIs empower you to create dynamic and interactive web pages that go far beyond static content.
Imagine HTML as the foundation of your web page. HTML APIs act as tools that allow you to manipulate this foundation, adding features like form validation, managing user interactions, and even accessing device capabilities. There are numerous HTML APIs available, each catering to specific tasks. Some common examples include:
Document Object Model (DOM) API: Grants control over the structure and content of your web page.
Fetch API: Enables efficient retrieval of data from web servers.
Geolocation API: Allows you to access a user's location information (with permission).
Web Storage API: Provides mechanisms for storing data on the client-side (browser) for persistence.
By mastering these APIs, you can transform your web pages from simple displays of information to full-fledged interactive applications. Remember, exploring and understanding HTML APIs unlocks a new level of web development possibilities.
HTML Geolocation
HTML Geolocation empowers web pages to access a user's geographic location with their permission. This functionality unlocks a variety of possibilities, such as displaying nearby restaurants, weather forecasts, or location-based services.
Locating the User's Position:
To leverage Geolocation, you can utilize the navigator.geolocation object in JavaScript. This object provides methods for obtaining the user's location data.
Using HTML Geolocation:
Here's how to implement basic Geolocation in your web page:
Request User Permission:
function getLocation() {
   if (navigator.geolocation) {
       navigator.geolocation.getCurrentPosition(showPosition, showError);
   } else {
       alert("Geolocation is not supported by this browser.");
   }
}
navigator.geolocation.getCurrentPosition() initiates the location request.
The function takes two callback functions as arguments:
showPosition: This function is executed if the user grants permission and location data is retrieved successfully.
showError: This function is called if the user denies permission or an error occurs.
Handle Success and Errors:
function showPosition(position) {
       let latitude = position.coords.latitude;
       let longitude = position.coords.longitude;
       alert("Latitude: " + latitude + "\nLongitude: " + longitude);
   }

   function showError(error) {
       switch (error.code) {
           case error.PERMISSION_DENIED:
               alert("User denied the request for Geolocation.");
               break;
           case error.POSITION_UNAVAILABLE:
               alert("Location information is unavailable.");
               break;
           case error.TIMEOUT:
               alert("The request to get user location timed out.");
               break;
           default:
               alert("An unknown error occurred.");
       }
 }
The showPosition function extracts the latitude and longitude from the position object received as a callback argument.
The showError function handles different error codes returned by the Geolocation API:
PERMISSION_DENIED: User denied access to location.
POSITION_UNAVAILABLE: Location data cannot be retrieved.
TIMEOUT: Request timed out.
Location-specific Information:
Once you have the user's coordinates, you can utilize mapping services or other APIs to retrieve location-specific information like:
Nearby businesses
Weather data
Points of interest
The getCurrentPosition() Method - Return Data (Property, Returns) Table:
(Optional) Accuracy of the altitude data (meters).
coords.heading
(Optional) User's device heading in degrees (0-360).
coords.speed
(Optional) User's movement speed in meters/second.
timestamp
Time when the location data was retrieved (milliseconds since epoch).
Geolocation Object - Other Interesting Methods:
Beyond getCurrentPosition(), the Geolocation API offers other functionalities:
watchPosition(): Continuously monitors the user's location and calls a function whenever it changes.
clearWatch(): Stops monitoring the user's location with watchPosition().
Remember, always handle user permission and potential errors gracefully when using Geolocation. This technology opens doors to innovative location-aware web experiences, but it's crucial to respect user privacy and provide a clear value proposition for requesting their location data.
HTML Drag/Drop
HTML Drag and Drop functionality empowers you to create intuitive interactions within your web pages. Users can drag elements from one location and drop them onto designated targets, enhancing user experience and engagement.
HTML Drag and Drop Example:
Imagine a sorting task where users can drag and drop list items to rearrange them. This is a prime example of how Drag and Drop can be implemented.
Making an Element Draggable:
Set the draggable attribute to true on the element you want users to drag.
The ondragstart event triggers when a user starts dragging an element.
Within this event handler, use the dataTransfer.setData() method to specify the data you want to drag along with the element.
let items = document.querySelectorAll("[draggable='true']");

items.forEach(item => {
    item.addEventListener("dragstart", function(event) {
        event.dataTransfer.setData("text/plain", this.id);  // Drag the element's ID
    });
});
Where to Drop (ondragover):
The ondragover event fires when a draggable element is hovering over a potential drop target.
Use this event to prevent the default behavior (which might not be desired) and specify what types of data the target can accept.
<div id="dropzone" ondragover="return false;" ondrop="drop(event)">
       Drop items here
</div>
let dropzone = document.getElementById("dropzone");

dropzone.addEventListener("ondragover", function(event) {
    event.preventDefault();  // Prevent default behavior (like opening a link)
       if (event.dataTransfer.types[0] === "text/plain") {  // Only accept text data
           this.style.backgroundColor = "#ccc";  // Visually indicate allowed drop
    }
});
Do the Drop (ondrop):
The ondrop event triggers when a draggable element is dropped on a valid target.
Within this event handler, access the dropped data and perform the desired action (e.g., update the DOM, process the data).
  function drop(event) {
    event.preventDefault();
    let droppedId = event.dataTransfer.getData("text/plain");  // Get the dragged element's ID
    let droppedItem = document.getElementById(droppedId);
    dropzone.appendChild(droppedItem);  // Move the element to the dropzone
    dropzone.style.backgroundColor = "";  // Reset dropzone style
}
Drag and Drop requires JavaScript for functionality.
This is a simplified example, and additional features like visual feedback and drop restrictions can be implemented for a more polished user experience.
By incorporating Drag and Drop functionality, you can create interactive and engaging web applications that empower your users!
HTML Web Storage
HTML Web Storage provides a mechanism for web applications to store data locally on the user's browser. This data persists beyond page refreshes or even browser closures, unlike cookies which are typically session-based. This documentation dives into the core concepts of Web Storage.
What is HTML Web Storage?
Web Storage offers two objects: localStorage and sessionStorage. These objects allow you to store key-value pairs of data locally on the user's device, enabling web applications to maintain state and user preferences between sessions.
HTML Web Storage Objects:
There are two primary Web Storage objects:
localStorage:
Stores data with no expiration.
Data persists even after the browser window or tab is closed and reopened.
Ideal for storing user preferences, application settings, or data that needs to be remembered across sessions.
sessionStorage:
Stores data for the current browser session only.
Data is cleared once the browser window or tab is closed.
Useful for temporary data that needs to be accessible during a single session but doesn't require long-term persistence.
ThelocalStorageObject:
Use the localStorage object to store data persistently on the client-side.
Access the localStorage object using the window.localStorage property.
// Setting a value in localStorage
localStorage.setItem("username", "Alice");

// Retrieving a value from localStorage
let userName = localStorage.getItem("username");
console.log(userName); // Output: Alice

// Removing a value from localStorage
localStorage.removeItem("username");
The sessionStorage Object:
Use the sessionStorage object to store data temporarily for the current session.
Access the sessionStorage object using the window.sessionStorage property.
// Setting a value in sessionStorage
sessionStorage.setItem("cart", JSON.stringify({ items: ["item1", "item2"] }));

// Retrieving a value from sessionStorage
let cartItems = JSON.parse(sessionStorage.getItem("cart"));
console.log(cartItems); // Output: { items: ["item1", "item2"] }

// Removing a value from sessionStorage
sessionStorage.removeItem("cart");
Key Considerations:
Both sessionStorage and sessionStorage have limited storage capacity (typically 5MB per domain).
Data is stored as strings. For storing complex data structures, consider using JSON.stringify() to convert them to strings before storing and JSON.parse() to convert them back to JavaScript objects upon retrieval.
HTML Web Storage empowers your web applications to manage state and user preferences effectively. By understanding sessionStorage and sessionStorage, you can create a more dynamic and user-friendly web experience. Remember, choose the appropriate storage object based on your data persistence requirements.
HTML SSE
HTML Server-Sent Events (SSE) provide a powerful mechanism for one-way communication between a server and a web page. It allows the server to send updates (events) to the client in real-time, without requiring the client to constantly refresh the page.
One-Way Messaging:
SSE establishes a persistent connection between the server and the client.
The server pushes data (events) to the client at any time.
The client cannot send messages back to the server using SSE, it's purely server-initiated communication.
Receiving Server-Sent Event Notifications:
The client utilizes the EventSource object to:
Establish a connection: Create an EventSource object, specifying the server endpoint that delivers the events.
Listen for events: Define event listeners to handle different types of events received from the server (e.g., message, open, error).
Checking Server-Sent Events Support:
Before relying on SSE, it's essential to check if the browser supports it:
if (typeof EventSource !== "undefined") {
  // SSE is supported, proceed with implementation
} else {
  // Handle browsers that don't support SSE
}
Server-Side Code Example (Example in Node.js):
const http = require('http');
const server = http.createServer((req, res) => {
  res.writeHead(200, { 'Content-Type': 'text/event-stream' });
  setInterval(() => {
    const message = `Server message: ${Date.now()}`;
    res.write(`data: ${message}\n\n`);
  }, 1000); // Send a message every second
});

server.listen(8080, () => console.log('Server started on port 8080'));
TheEventSourceObject with (Events, Description) table:
Event
Description
message
Triggered when the server sends a new message. The data property of the event contains the message content.
open
Fired when the connection to the server is established successfully.
error
Occurs when an error happens during the connection or event processing.
SSE offers a lightweight and efficient approach for real-time communication in web applications. By implementing SSE on both the server and client sides, you can create dynamic and engaging web experiences that keep users updated with the latest information. Remember, SSE excels at unidirectional data flow from server to client.
HTML Web Workers
Web Workers are a powerful feature in HTML that allows you to run JavaScript code in the background, separate from the main thread. This separation is crucial for maintaining a smooth user experience by preventing long-running tasks from blocking the main thread, which handles UI rendering and user interactions.
What is a Web Worker?
Imagine a web page as a busy kitchen. The main thread is the head chef, responsible for coordinating everything. Web Workers are like assistant chefs working in the background, handling time-consuming tasks like complex calculations or data processing without interrupting the head chef's ability to prepare the main course (updating the UI).
HTML Web Workers Example:
Here's a simplified example demonstrating how a Web Worker can perform a time-consuming task without affecting the UI responsiveness:
function calculatePrimes(n) {
  let primes = [];
  for (let i = 2; i <= n; i++) {
    if (isPrime(i)) {
      primes.push(i);
    }
  }
  return primes;
}

function isPrime(num) {
  if (num <= 1) return false;
  for (let i = 2; i < Math.sqrt(num); i++) {
    if (num % i === 0) return false;
  }
  return true;
}

self.onmessage = function(event) {
  const number = event.data;
  const primes = calculatePrimes(number);
  self.postMessage(primes);
};
Explanation:
The main.html file includes the worker.js script.
Clicking the button creates a new Web Worker instance using new Worker("worker.js").
The worker.js script defines functions for calculating prime numbers.
The Web Worker listens for messages from the main thread (self.onmessage).
When the button is clicked, the main thread sends a message (number) to the Web Worker.
The Web Worker calculates primes and sends the results back to the main thread using self.postMessage(primes).
The main thread receives the message (event.data) and displays the results in the paragraph.
Additional Considerations:
Check Web Worker Support: Use if (typeof Worker !== 'undefined') to ensure compatibility.
Create a Web Worker File: Separate JavaScript code for the worker logic.
Create a Web Worker Object: Use new Worker() to create the worker instance.
Terminate a Web Worker: Use worker.terminate() to stop the worker when no longer needed.
Reuse the Web Worker: A single Web Worker can handle multiple tasks from the main thread.
By leveraging Web Workers, you can create responsive and performant web applications that handle complex tasks efficiently. Remember, offloading work to Web Workers keeps your UI smooth and interactive!
Where knowledge is just a click away !
DocsAllOver is a one-stop-shop for all your software programming needs, from beginner
tutorials to advanced documentation
Get In Touch
We'd love to hear from you! Get in touch and let's collaborate on
something great